User Guide
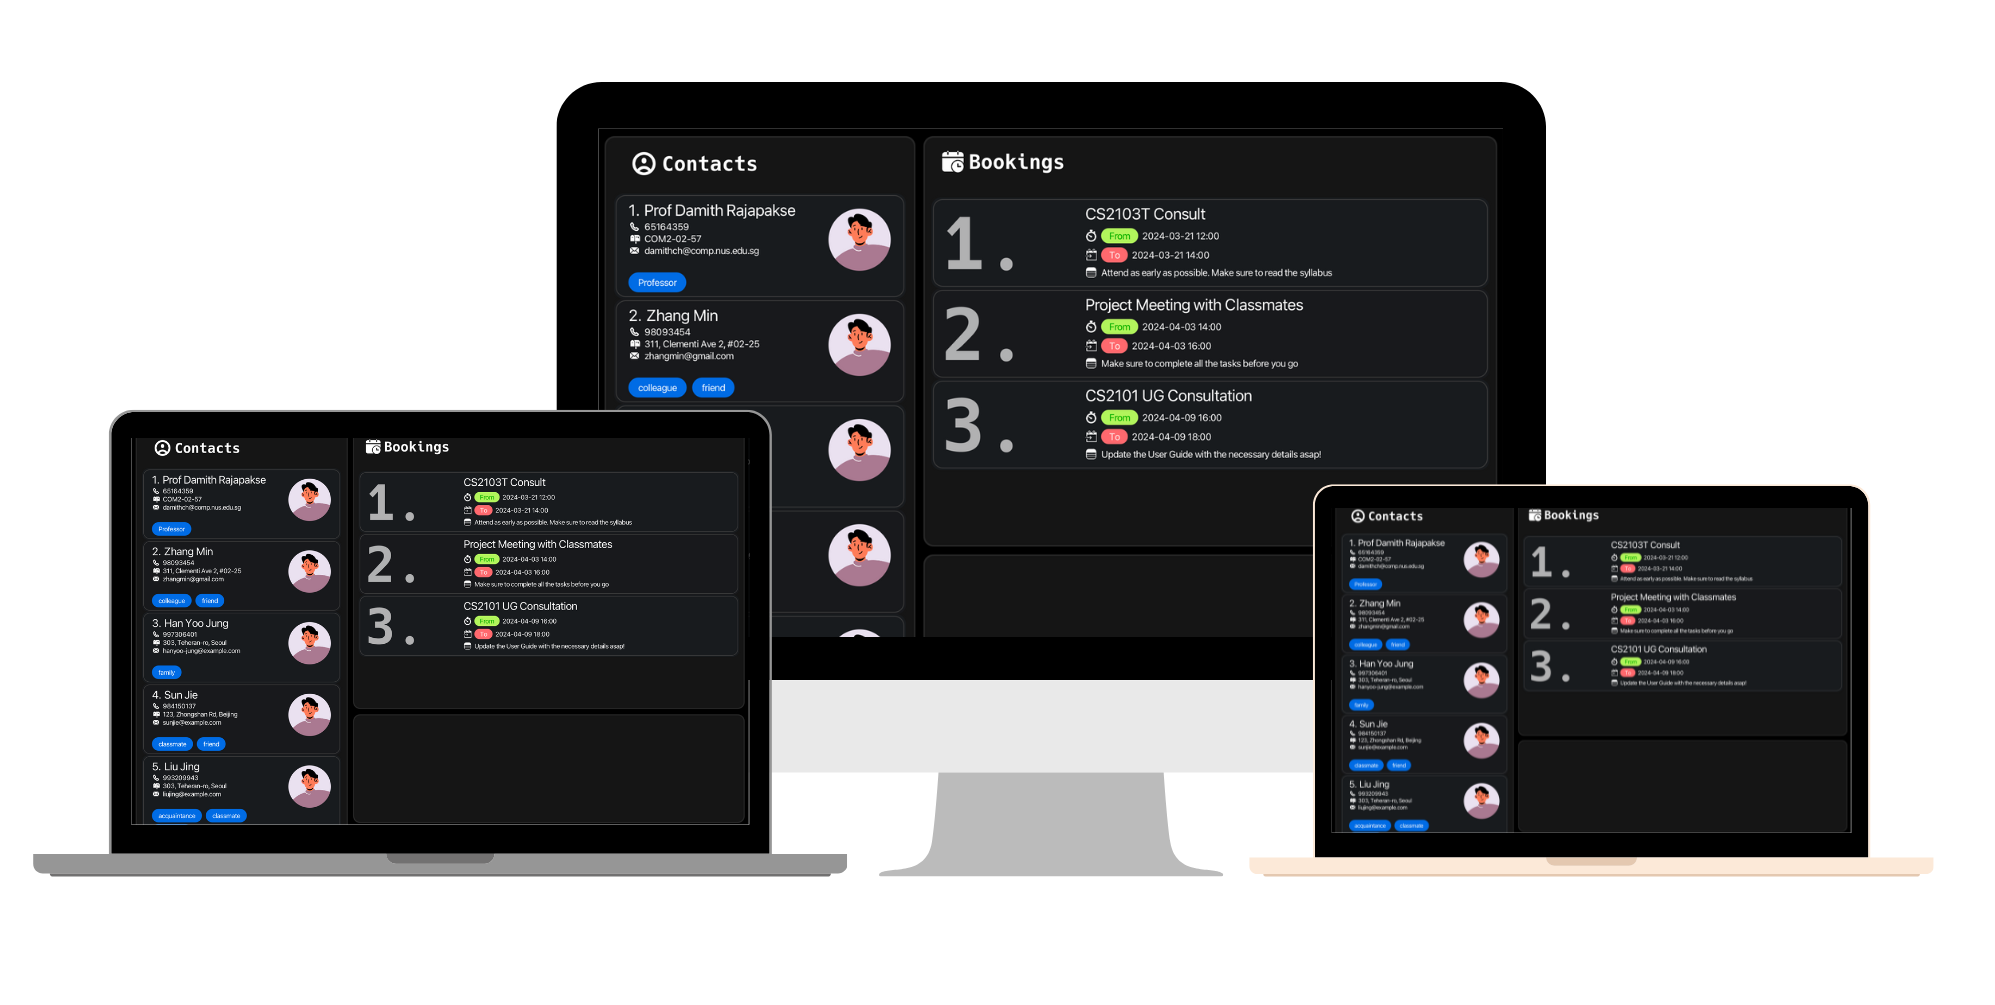
What is Dook?
An elegant, minimalistic and intuitive desktop application made especially for NUS Computing students to easily manage their academic consultations and contacts all-in-one place.
Dook blends the power of a nimble Command Line Interface (CLI) together with the intuitive accessibility of a Graphical User Interface (GUI).
Designed for the dynamic needs of the NUS School of Computing (SoC) community, Dook centralizes faculty information in an innovative manner, allowing one to easily find their professors by taking advantage of the basic CLI familiarity of SoC students.
For the quick typist, Dook elevates your ability to swiftly organize your academic consultations with professors and teaching assistants, outpacing conventional GUI-based applications, making management of consultations a breeze.
We hope that you will find this guide helpful in maximising your Dook experience! :)
Using the Guide
We hope that this guide will familiarise you with the CLI commands and GUI and interface. If you are unfamiliar with some jargon here, do have a quick look at our glossary below! :)
- For first-time users, please take a look at our Quick Start section to start an end-to-end tutorial for Dook.
- For seasoned users who know command line and/or have used Dook before, do take a look at our Command Summary for a refresher!
Throughout this guide, we also use coloured boxes to provide any important or extra pointers that we hope you would find useful.
![]() Information
Information
Content in blue boxes provides additional information and contextual knowledge you need to better understand Dook.
![]() Tips
Tips
Content in green boxes provides tips and good practices to help you use the application more efficiently.
![]() Caution
Caution
Content in yellow boxes draws your attention to certain minor issues that you may encounter when using Dook.
![]() Warnings
Warnings
Content in red boxes draws your attention to potential pitfalls to avoid and alert you to possible errors.
Table of Contents
- What is Dook?
- Using the Guide
- Table of Contents
- Quick start
- Understanding the Interface
- Features
- FAQ
- Known issues
- Command Summary
- Glossary
Quick start
-
Ensure you have Java 11 or above installed in your Computer. If you have never downloaded it before, download from here.
-
Download the latest version of Dook
jarin your computer. -
Copy the file into an empty folder you want to use as the
home folderfor Dook. -
Depending on your operating system, either open “Terminal” on macOS or “Command Prompt” in Windows, and type
java -jar Dook.jarto run the application.
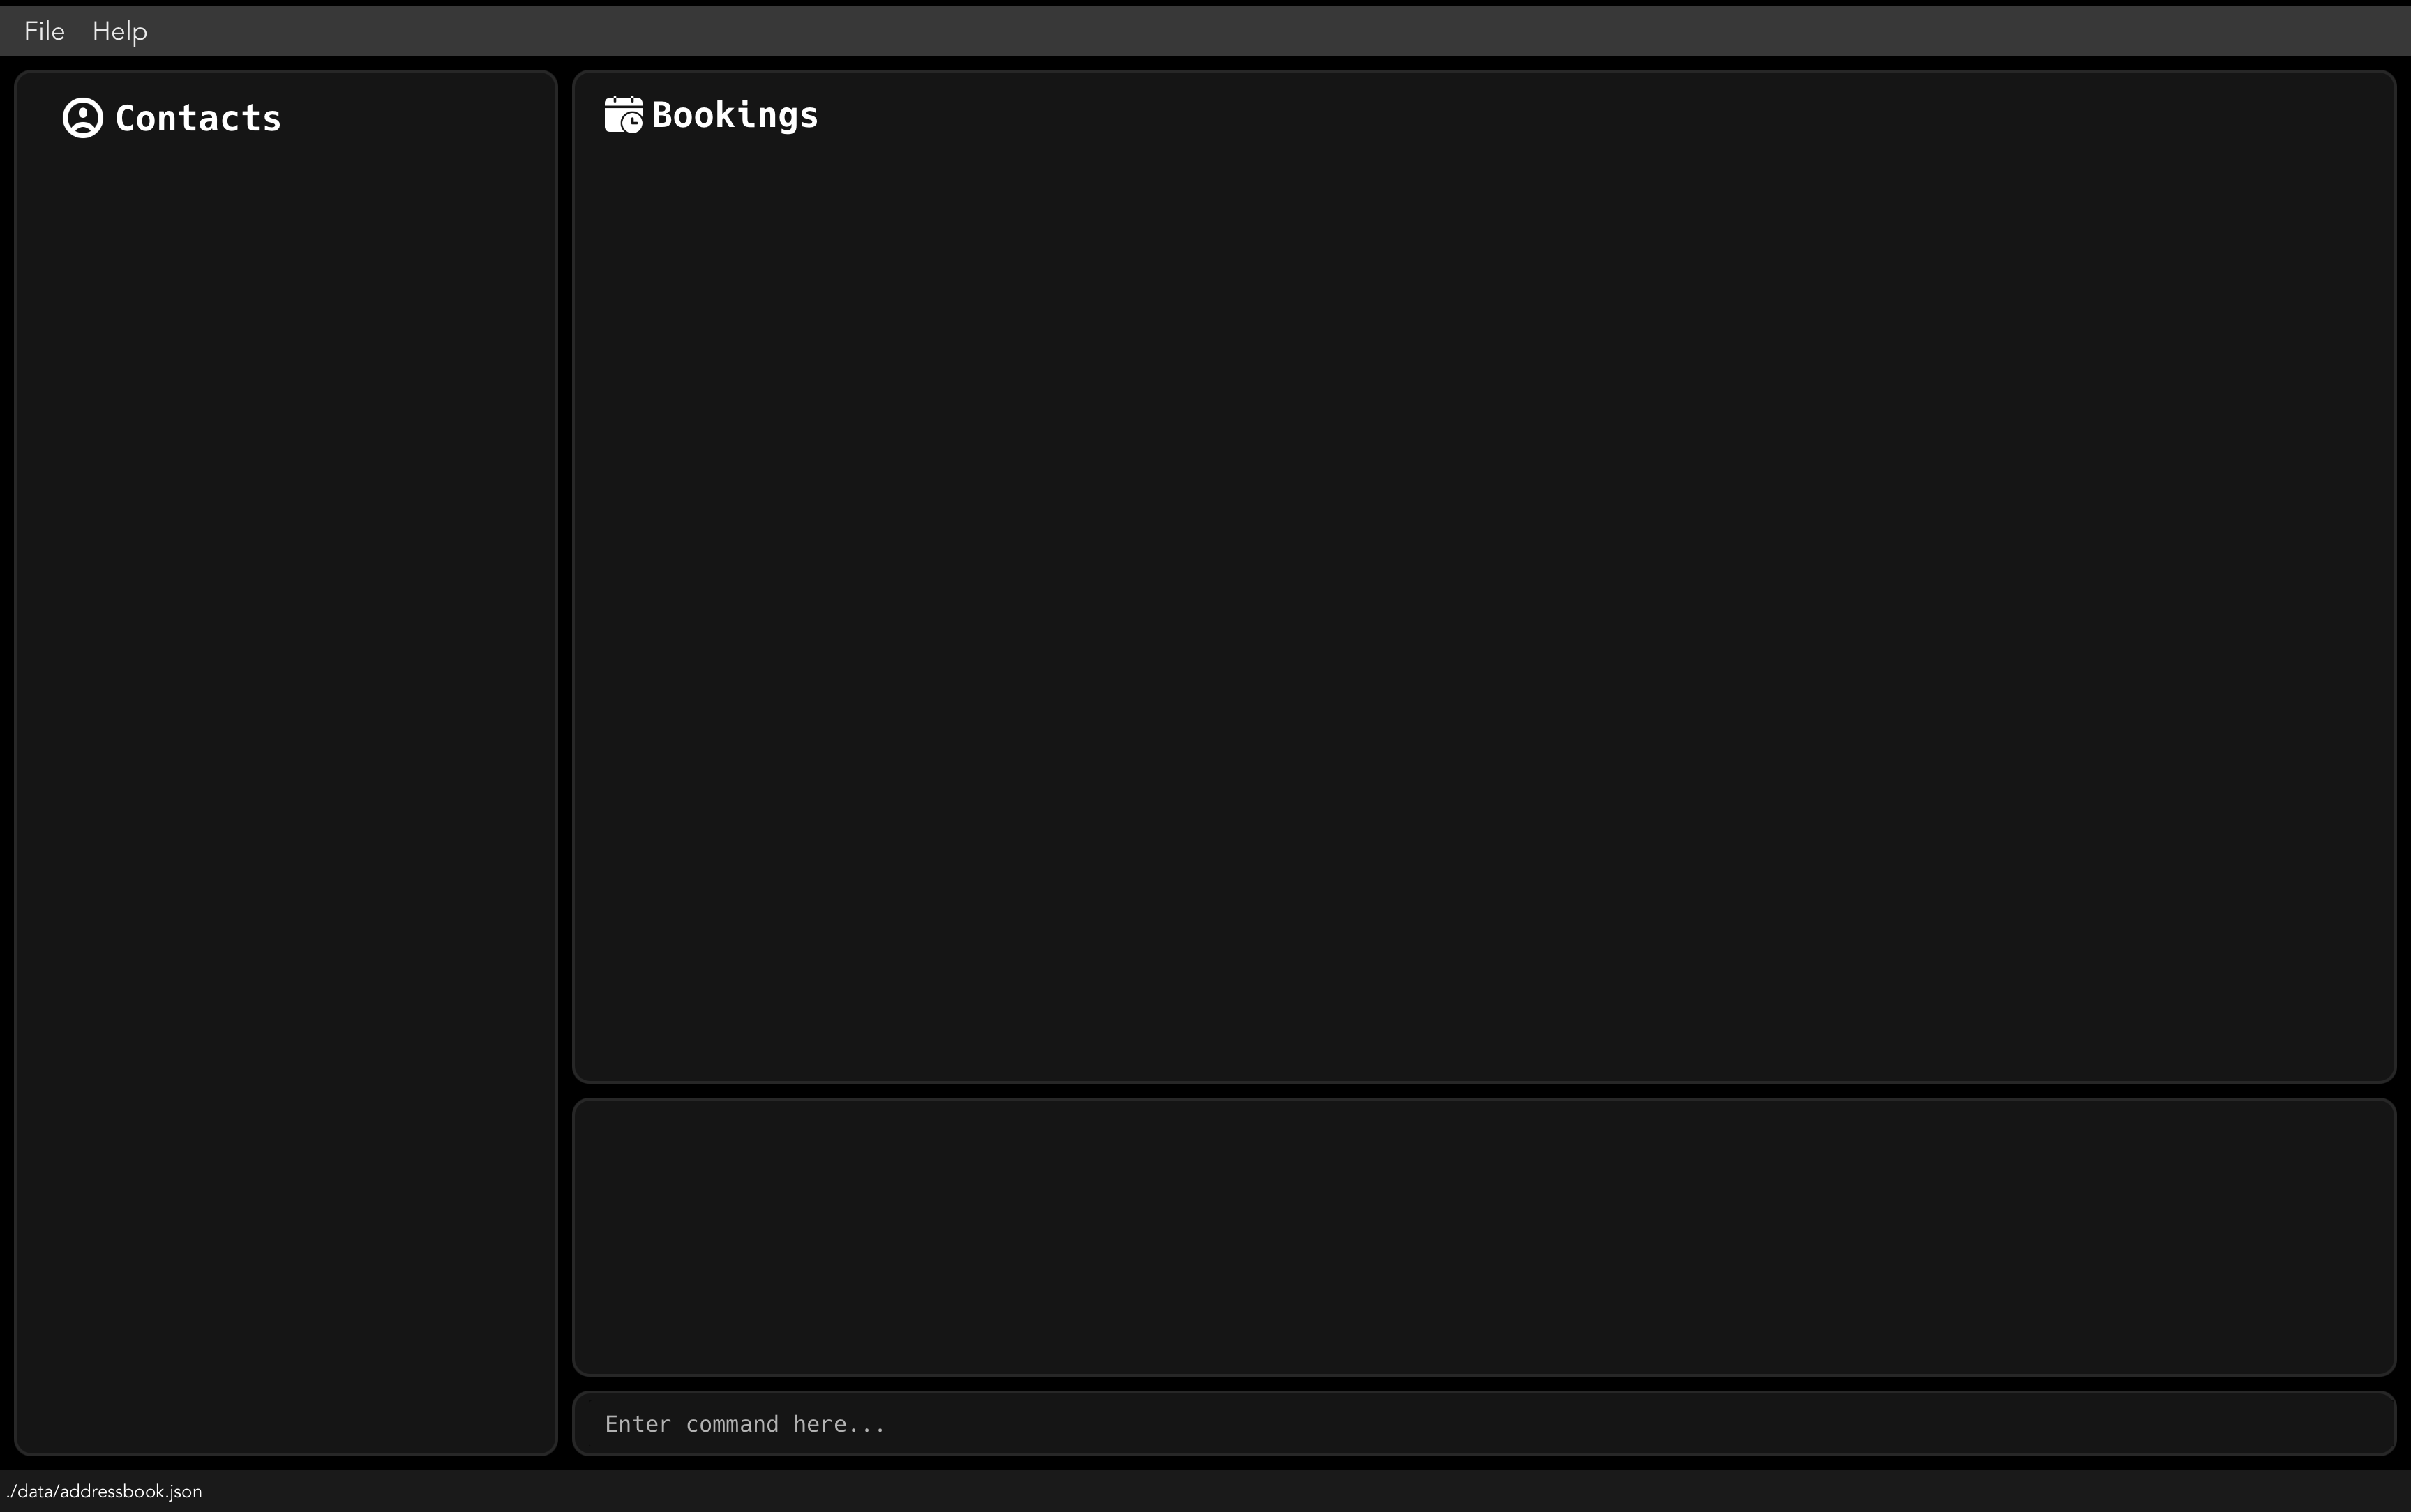
You should see a GUI similar to the one shown below pop up in a few seconds.
![]() Note
Note
Please note that the application doesn’t come with any sample data and that’s why we will show you how to add your own in the next section.
![]() Information
Information
New to the command line? Don’t worry, checkout this guide
Let’s add some sample data
-
First, go to the command box on the main window, where it says
“Enter Command here…“

- Now, type
helpto open another window that lists out all the commands native to Dook. - Next, paste this command in the
command boxto add a new contact namedBob Smithto the Dook address book.add -n Bob Smith -p 98765432 -e bsmith@example.com -a Bedok 693021 - Now, let’s add some sample consultations. Paste this in your command box to add a consultation named
CS2103T Consultation.book -n CS2103T Consultation -s 2024-04-21 14:00 -e 2024-04-21 16:00 - Repeat steps 3 - 4 to add some more sample data, however this time change the details after each flag. (for example,
add -n Celine -p 98564383 ...) - Now, let’s find a consultation by typing
search CS2103T Consultationinto thecommand box - Voila! You did it. You finally added some sample data to Dook and tried some native features as well.
- Now, let’s exit the app using
exitcommand.
![]() Worried about getting your data lost?
Worried about getting your data lost?
Don’t worry, your data is automatically saved to Dook Address Book!
Many thanks for joining us in this tutorial. For additional commands, please refer to the Features section below for details of every available command.
Understanding the Interface
The main interface is divided into two main panels (Booking and Contact) and 4 smaller elements (shown below). There’s a menu bar at the top with two buttons File
and Help, and at the bottom there’s a status bar displaying the location of the addressbook.json file.
![]() Information
Information
A JSON file is a text-based format for storing and exchanging data. JSON stands for JavaScript Object Notation.
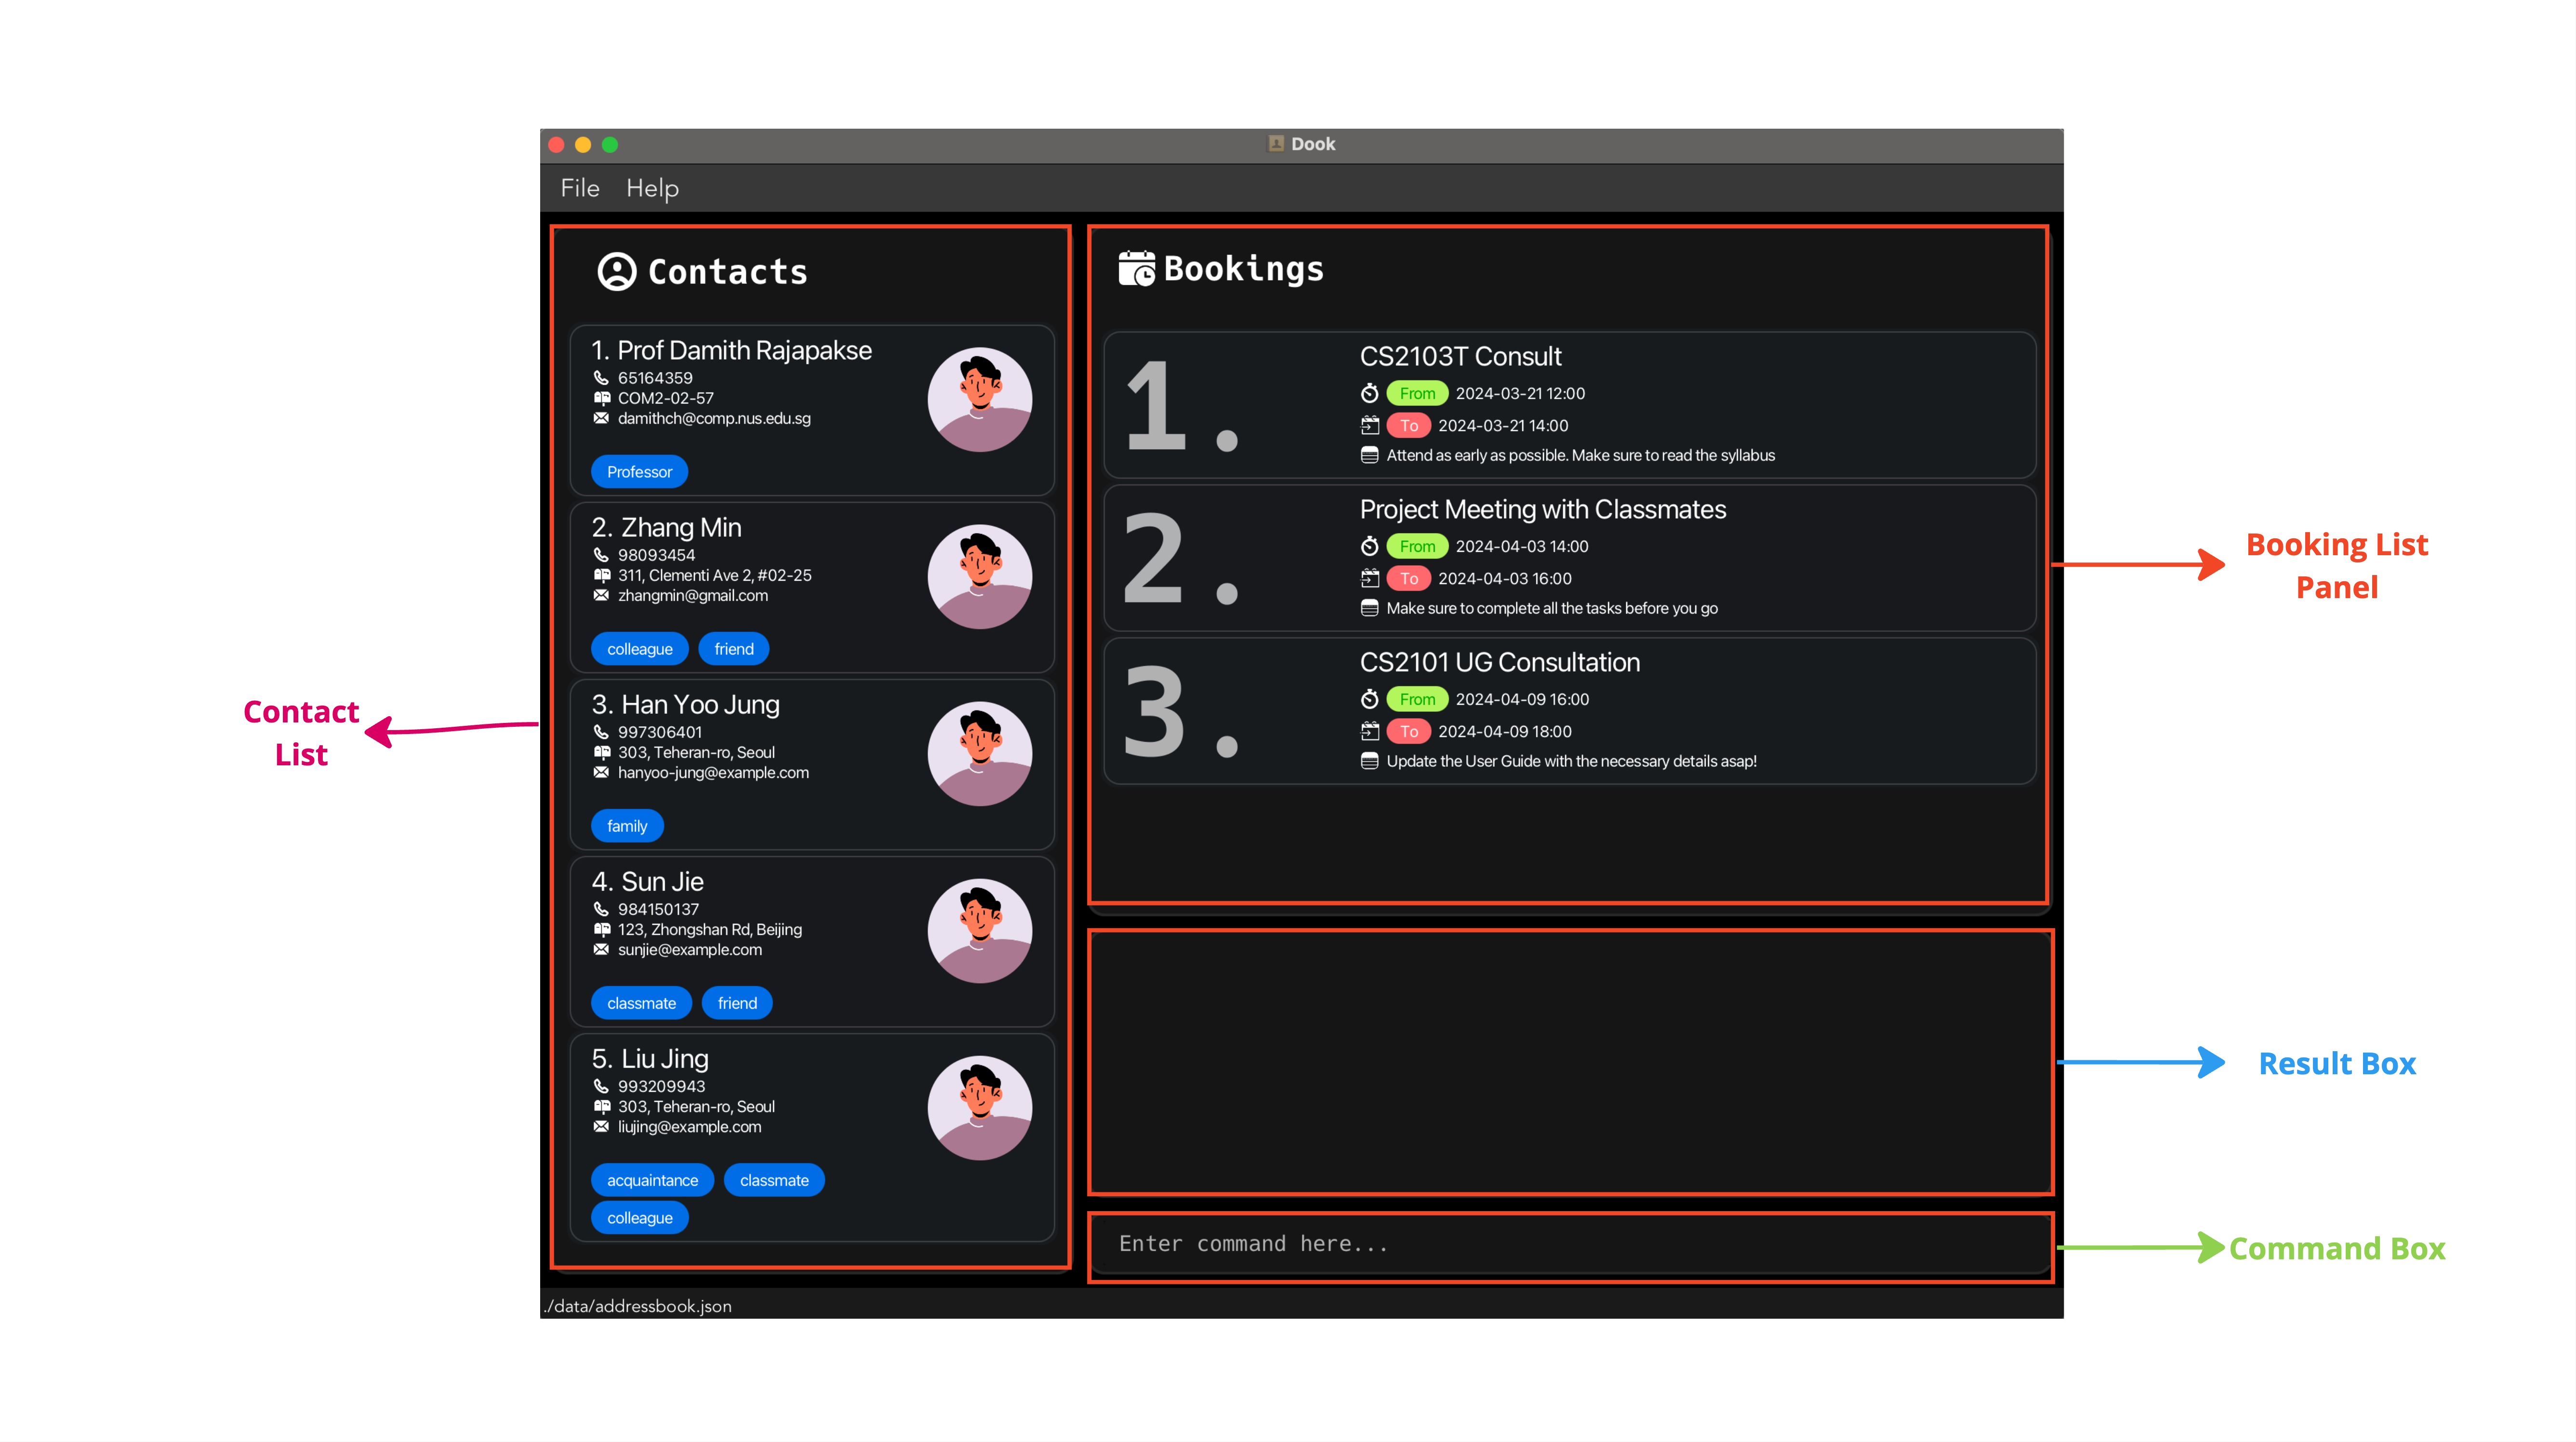
Here’s your guide of the different panels:
-
Contact List: Displays all contacts in the Dook address book. -
Booking List: Shows all the bookings the user currently has. -
Result Box: Displays the output after each command is executed. -
Command Box: Allows users to enter commands.
Contact Card

Each Contact card Includes the following information:
-
Prof Damith Rajapakse- Contact Name -
65164359- Phone Number -
COM2-02-57- Address -
damithch@comp.nus.edu.sg- Email -
Professor- Tag
![]() Tips
Tips
You can easily add a new contact using the add command or edit the existing information with the edit command.
Booking Card

Each Booking card Includes the following information:
-
CS2103T Consult- Consultation Title -
2024-03-21 12:00- Start Date and Time -
2024-03-21 14:00- End Date and Time -
Attend as early as possible...- Notes or Descriptions for the consultation
![]() Tips
Tips
You can easily update the following details with the update command or cancel any existing bookings immediately.
Result Box
Displays two kinds of information/indication based on the command executed.
Upon Success:

Upon Failure:

Help Window
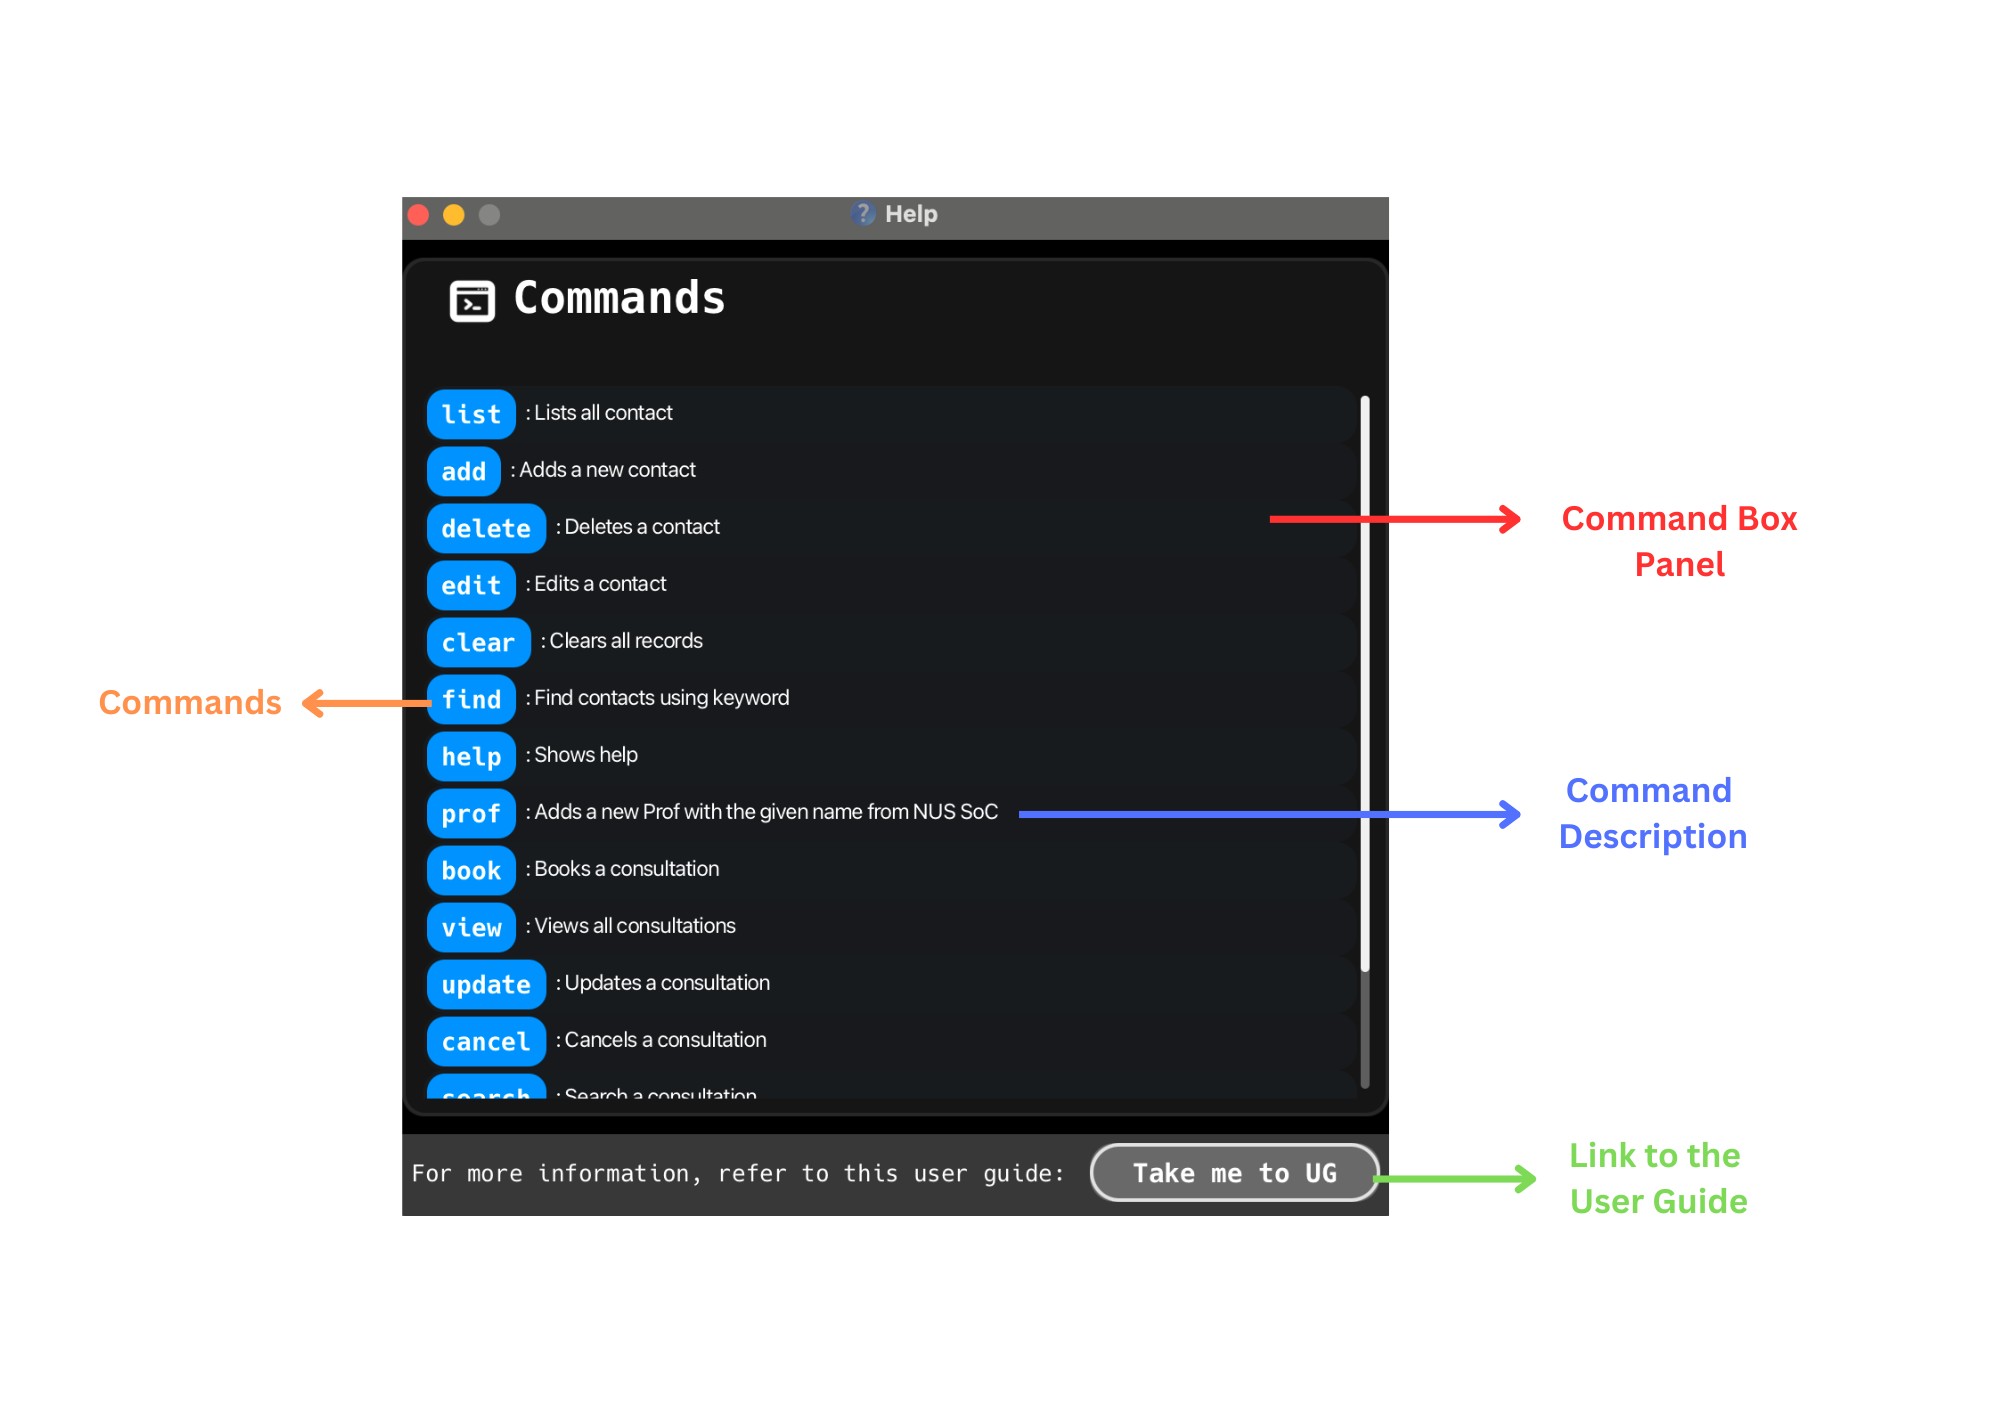
Displays a window with Command Box Panel and Take me to UG link.
-
Command Box Panel- it consists of all the commands native to Dook. -
Take me to UG- a link that takes you directly to the User Guide for more information on each feature.
![]() Note
Note
Take me to UG is the only time when Dook uses internet connection to take you to the User Guide. Otherwise, Dook is offline for most of its uses.
Format: help
Instruction:
- Type
helpin theCommand Boxto open this window, - Or, press
HelpButton on the main interface.
It will open a window similar to this:
Features
![]() Notes about the command format:
Notes about the command format:
-
Words in
UPPER_CASEare the parameters to be supplied by the user.
e.g. inadd -n NAME,NAMEis a parameter which can be used asadd -n John Doe. -
Items in square brackets are optional.
e.g-n NAME [-t TAG]can be used as-n John Doe -t friendor as-n John Doe. -
Items with
… after them can be used multiple times including zero times.
e.g.[-t TAG]…can be used as-t friend,-t friend -t familyetc. -
Parameters can be in any order.
e.g. if the command specifies-n NAME -p PHONE_NUMBER,-p PHONE_NUMBER -n NAMEis also acceptable. -
Extraneous parameters for commands that do not take in parameters (such as
help,list,exitandclear) will be ignored.
e.g. if the command specifieshelp 123, it will be interpreted ashelp. -
If you are using a PDF version of this document, be careful when copying and pasting commands that span multiple lines as space characters surrounding line-breaks may be omitted when copied over to the application.
Contact Management
Adding a contact: add
Situation: With every contact book, we need to be able to create contacts. You have just made a new friend in your tutorial and decided to save his contact for future collaboration purposes.
add -n NAME [-p PHONE_NUMBER] [-e EMAIL] [-a ADDRESS] [-t TAG…]
| Param | Remarks |
|---|---|
| NAME | Must be non-null and unique |
| PHONE_NUMBER | Optional, only numbers and no minimum number of digits |
| Optional, follow standard email formats (i.e xxx@xxx) | |
| ADDRESS | Optional |
| TAG | Optional, each tag should start with -t (i.e. for two tags friend, groupmate use -t friend -t groupmate) |
![]() Warning
Warning
Currently, Dook doesn’t have the ability to recognise abbreviations (with a forward slash) such as d/o or s/o in the NAME parameter, so it might return an error.
![]() Information
Information
null means empty!
For example:
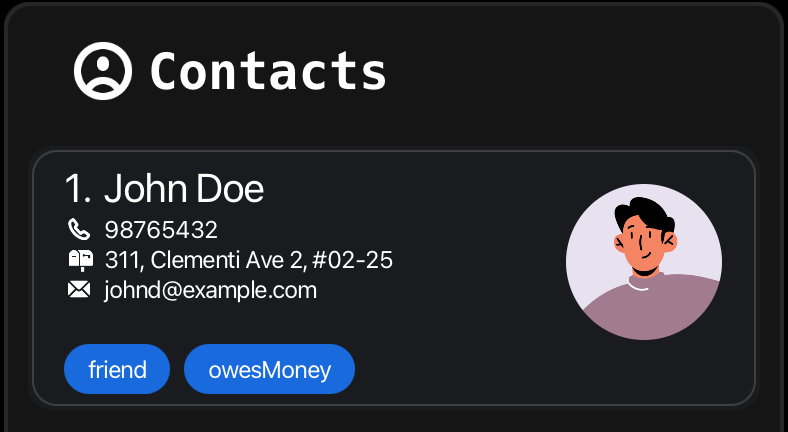
add -n John Doe -p 98765432 -e johnd@example.com -a John street, block 123, #01-01add -n Betsy Crowe -t friend -e betsycrowe@example.com -a Newgate Prison -p 1234567 -t criminal
Below shows the successful output upon executing add command:

Below shows the contact list upon successful adding of contact:
In the event that the command entered is invalid, the below error message will be shown:

In the event that there is an existing user in the contact book, the below error message will be shown:

Adding a Professor prof
Situation: You have just taken CS2040S and you now have a favorite Professor in SoC! You would like to stay in contact with them and have their updated contact details at your fingertips.
To add a specific Professor to the Dook,
prof -n NAME
| Param | Remarks |
|---|---|
| NAME | Must be non-null and unique (and must be from NUS SoC) |
Examples:
prof -n aaron
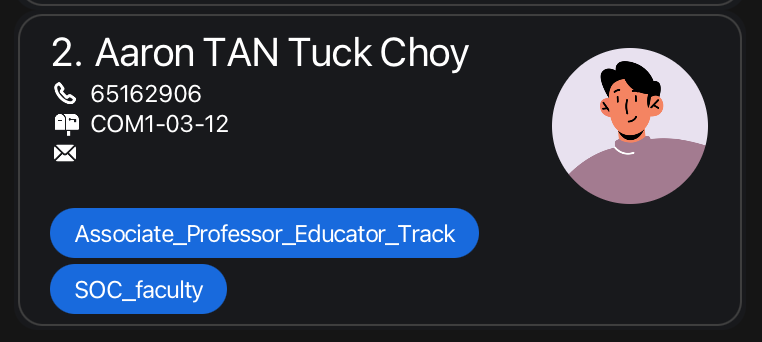
You can also easily add all SoC staff faculty to Dook with one command:
prof -a
![]() Caution
Caution
While adding all professors is included as feature, we generally advise against this. You might find adding professors individually more useful unless you decide having the whole SoC staff faculty in your contact book is necessary!
The
prof -a command takes a bit of time to load all the data, as we are adding over 300+ contacts into Dook.
We recommend that upon running this command, you as a user should wait a few seconds and not force close the application or run other commands
as it could lead to unexpected behaviors. Our team is aware of this and is looking into a more efficient solution to add all professors!
Listing all contacts : list
Situation: You decided one day to touch base with all your course-mates and friends in NUS.
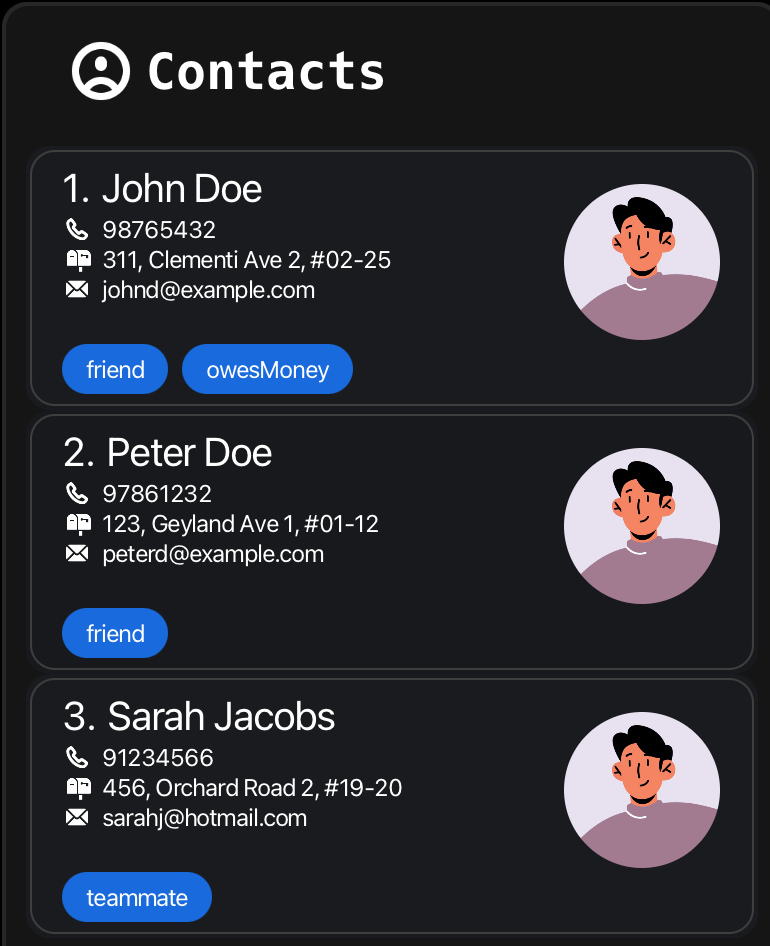
This command lets you easily view all the people in your contacts!
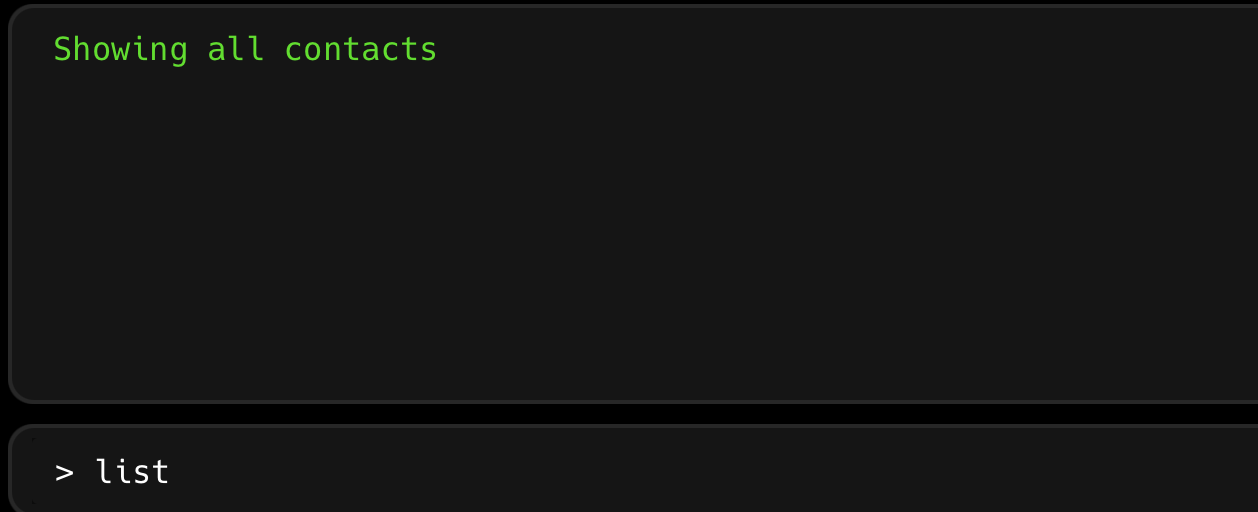
Format: list
Below shows the successful output upon executing list:
Below shows the contact list upon executing list:
Editing a contact : edit
Situation: You just had a zoom call with an old friend and realised he changed his phone number because he had migrated overseas.
The command allows you to update an existing contact’s details.
edit INDEX [-n NAME] [-p PHONE] [-e EMAIL] [-a ADDRESS] [-t TAG]…
- Edits the person at the specified
INDEX. The index refers to the index number shown in the displayed person list. The index must be a positive integer 1, 2, 3, … - At least one of the optional fields must be provided.
- Existing values will be updated to the input values.
| Param | Remarks |
|---|---|
| INDEX | Must be an integer in the range [1, number of contacts displayed] |
| NAME | Optional |
| PHONE_NUMBER | Optional, only numbers and no minimum number of digits |
| Optional, follow standard email formats (i.e xxx@xxx) | |
| ADDRESS | Optional |
| TAG | Optional, each tag should start with -t (i.e. for two tags friend, groupmate use -t friend -t groupmate) |
Examples:
-
edit 1 -p 91234567 -e johndoe@example.comEdits the phone number and email address of the 1st person to be91234567andjohndoe@example.comrespectively. -
edit 2 -n Betsy Crower -tEdits the name of the 2nd person to beBetsy Crowerand clears all existing tags.
Below shows the current state of a contact information before updating:

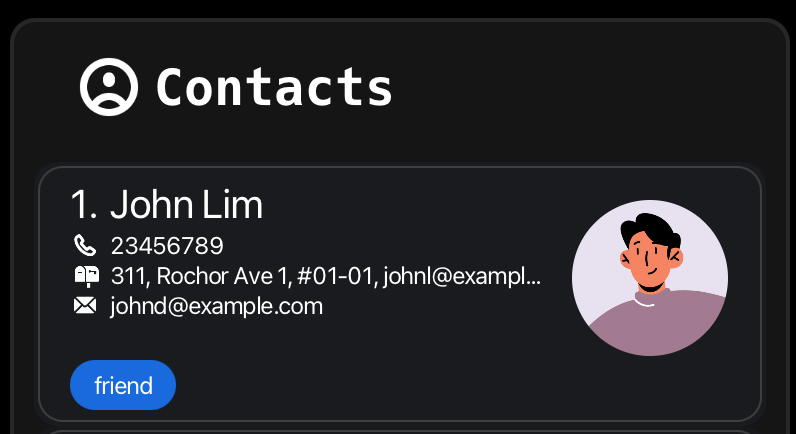
Below would be the expected output upon executing the command edit 1 -n John Lim -p 23456789 -a 311, Rochor Ave 1, #01-01, johnl@example.com -t friend,

Below shows the updated state of the contact information after updating:
![]() Information
Information
When editing tags, the existing tags of the person will be removed i.e adding of tags is not cumulative.
Locating contacts by name: find
Situation: You have just met a wonderful group of NUS students at a networking event, and you’ve added their details to the contact book. A few days later, you want to send a follow-up email to one of them, but their name escapes you. You remember it started with “John”.
This command allows you to quickly retrieve all names that match, ensuring you can maintain that crucial connection without a hitch.
Format: find KEYWORD [MORE_KEYWORDS]
- The search is case-insensitive. e.g
hanswill matchHans - The order of the keywords does not matter. e.g.
Hans Bowill matchBo Hans - Only the name is searched.
- Only full words will be matched e.g.
Hanwill not matchHans - Persons matching at least one keyword will be returned (i.e.
ORsearch). e.g.Hans Bowill returnHans Gruber,Bo Yang
![]() Information
Information
For now, we can only find contacts by name - future implementations would include finding by other fields as well,
so stay tuned!
Examples:
-
find JohnreturnsjohnandJohn Doe -
find alex davidreturnsAlex Yeoh,David Li
Below shows all the current contacts in our contact list, say we have 3 contacts, John Doe, Peter Doe and Sarah Jacobs:

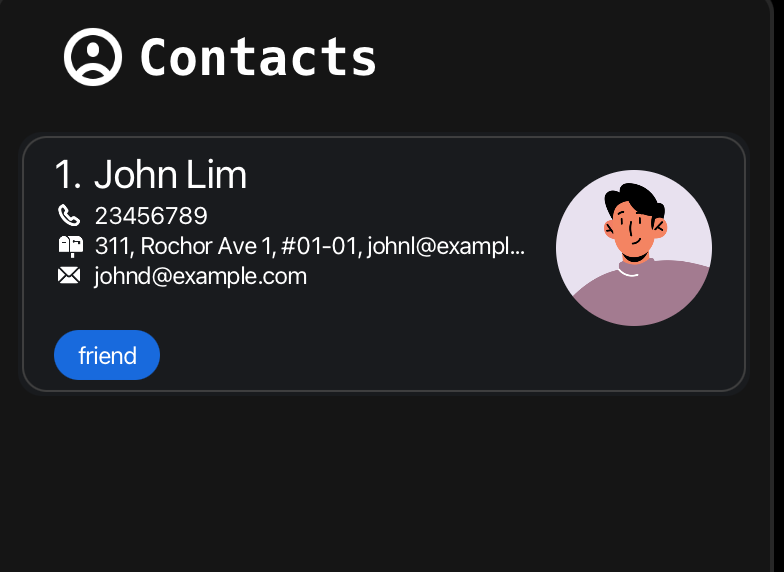
Say we only want contacts with “John” in our contact list, we shall execute find John to achieve this.
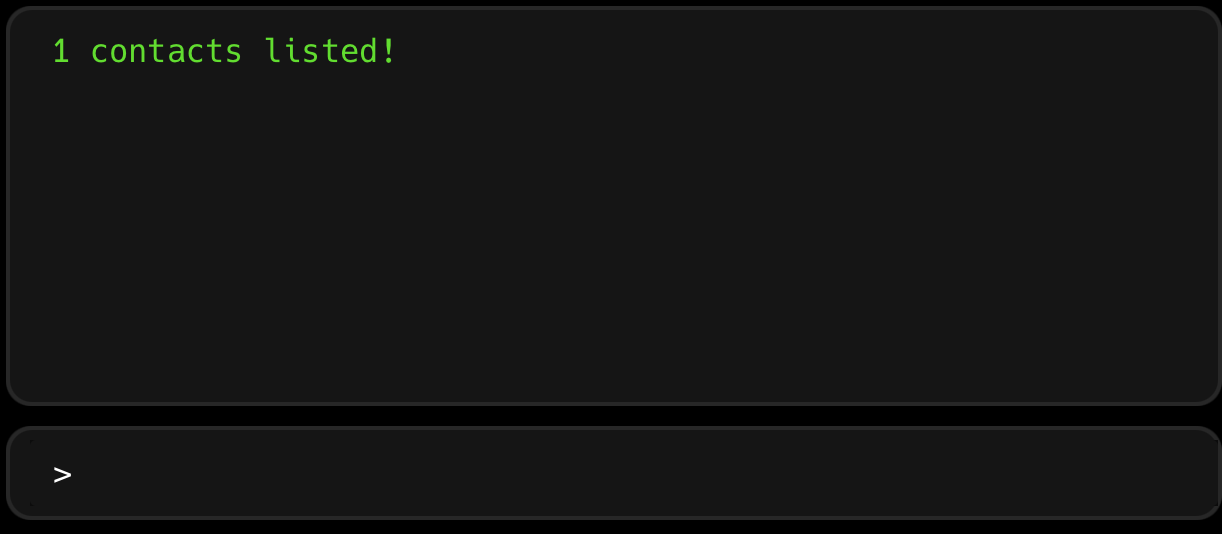
Below shows the expected output after running the command, there is only 1 contact with John in their name:
Below shows the expected contact list after running the command:
![]() Information
Information
This command will also fetch all existing Professors in the contact book if there is a match!
Deleting a contact : delete
Situation: Your contact book is starting to look cluttered, and you realise you no longer certain contacts’ details.
This command deletes the specified person from the contact book, ensuring your contacts remain relevant and up-to-date.
Format: delete INDEX
- Deletes the person at the specified
INDEX. - The index refers to the index number shown in the displayed person list.
- The index must be a positive number 1, 2, 3, …
Examples:
-
listfollowed bydelete 2deletes the 2nd person in the address book.
Below shows the current state of our contact list:
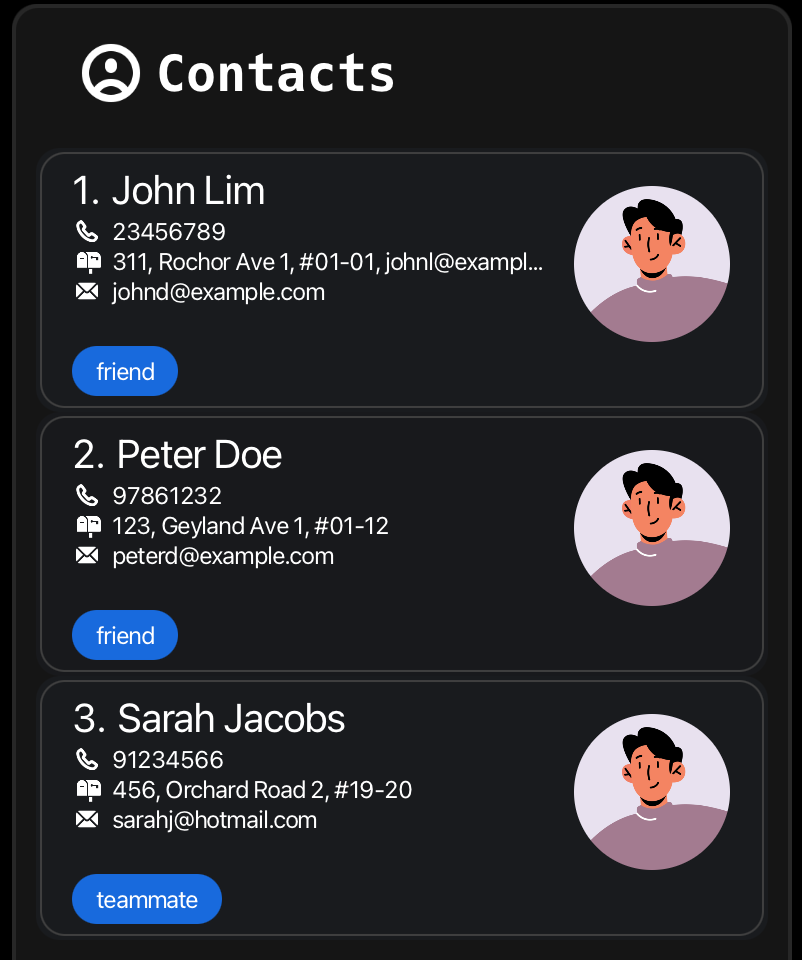
Say we want to remove Sarah Jacobs from our contact list, as she migrated overseas to pursue her masters, and we lost contact.
We observe that she is index number 3 in our contact list. As such, we will run delete 3 in our command box.
Below is the expected output after running delete 3:

Below is the expected contact list after running delete 3, we observe Sarah Jacobs no longer exists in our contact list.

![]() Tips
Tips
find John followed by delete 1 deletes the 1st person with the name John.
![]() Be careful!
Be careful!
This command is irreversible, the deleted contact information will be lost!
Booking Management
Adding a booking : book
Situation: Dook allows you to keep track of all your consultations, so you never have to worry above forgetting them!
Say you booked a consultation in the next week, and you would like to keep track of it. The book command is for you!
book -n DESCRIPTION -s START_TIME -e END_TIME -note NOTE
- Duplicate bookings are not allowed! This means that across two bookings, you cannot have all four params to be the exact same.
- For now: start and end time formats must be in
yyyy-mm-dd hh:mm(we are working to expand this!)
| Param | Remarks |
|---|---|
| DESCRIPTION | Must be non-null |
| START_TIME | Must follow format of 2023-12-31 19:00
|
| END_TIME | Must follow format of 2023-12-31 19:00
|
| NOTE | Must be non-null |
Examples:
book -n CS2101 Consult -s 2023-12-31 19:00 -e 2023-12-31 23:00 -note DO HOMEWORK
Below shows our original dashboard before adding a booking:

Say we booked a consultation slot a week later, and we would like to add it to Dook in case we forget.
Below shows the expected output after executing the command book -n CS2101 Consult -s 2023-12-31 19:00 -e 2023-12-31 23:00 -note DO HOMEWORK.
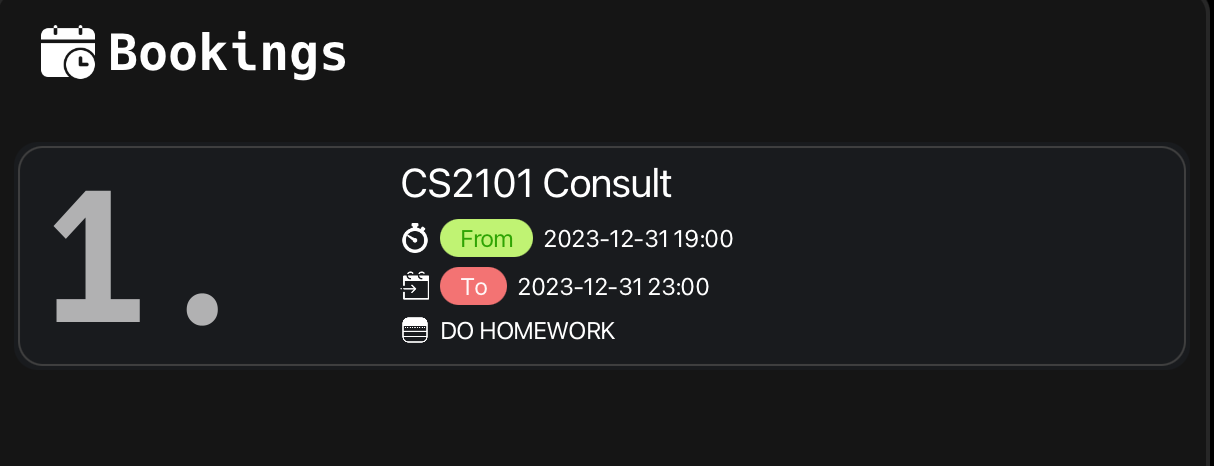
Below shows the expected success message upon executing the above command.

Updating bookings: update
Situation: The Professor took a rain-check and decided to reschedule your consult. Now we need to update our booking details!
update INDEX -n {DESCRIPTION} -s {START_TIME} -e {END_TIME} -note {NOTE}
- The index refers to the index number shown in the displayed booking list.
- Other params are optional and entered only if you want to update current data.
| Param | Remarks |
|---|---|
| INDEX | Refers to currently displayed bookings |
| DESCRIPTION | Optional |
| START_TIME | Optional, Must follow format of 2023-12-31 19:00
|
| END_TIME | Optional, Must follow format of 2023-12-31 19:00
|
| NOTE | Optional |
Examples:
update -1 -s 2024-01-02 19:00 -e 2024-01-02 23:00 -note DO HOMEWORK
Below shows our current booking that we scheduled for next week.

The Professor decides to postpone the consult to two days later, we shall execute the command update 1 -s 2024-01-02 19:00 -e 2024-01-02 23:00 -note DO HOMEWORK.
Below shows the updated booking upon executing the command.
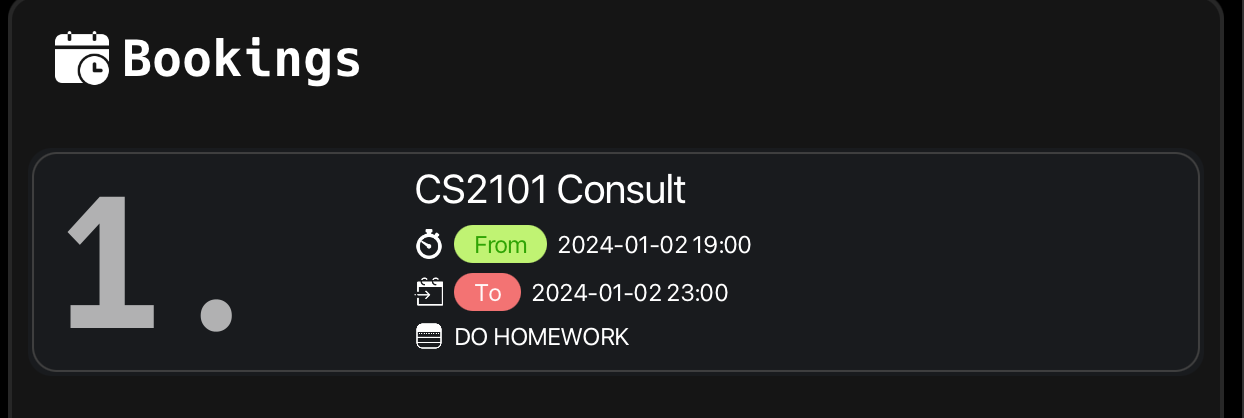
Below shows the success message upon executing the command.

![]() Caution
Caution
The date must exist on the calendar, so 31st Feb or 31st Apr would not be allowed!
Cancelling a booking : cancel
Situation: You realised that you are not available on the current booking date, and you have apologised to the Professor to cancel the booking altogether.
We shall use the cancel command to remove a booking from Dook.
cancel INDEX
- Deletes the booking at the specified
INDEX. - The index refers to the index number shown in the displayed booking list.
Examples:
-
cancel 1cancels the 1st booking shown in the booking list.
Below shows our current bookings in Dook.

We decide to cancel the CS2101 Consult altogether. We notice that the index of the booking is 1.
We shall use cancel 1 to remove this booking from Dook.
Below shows our current bookings after executing cancel 1.

Below shows the success message upon executing the command.

![]() Tips
Tips
You might want to use search to display the booking in the GUI first to easily find its INDEX.
Clearing all bookings entries : cancel -a
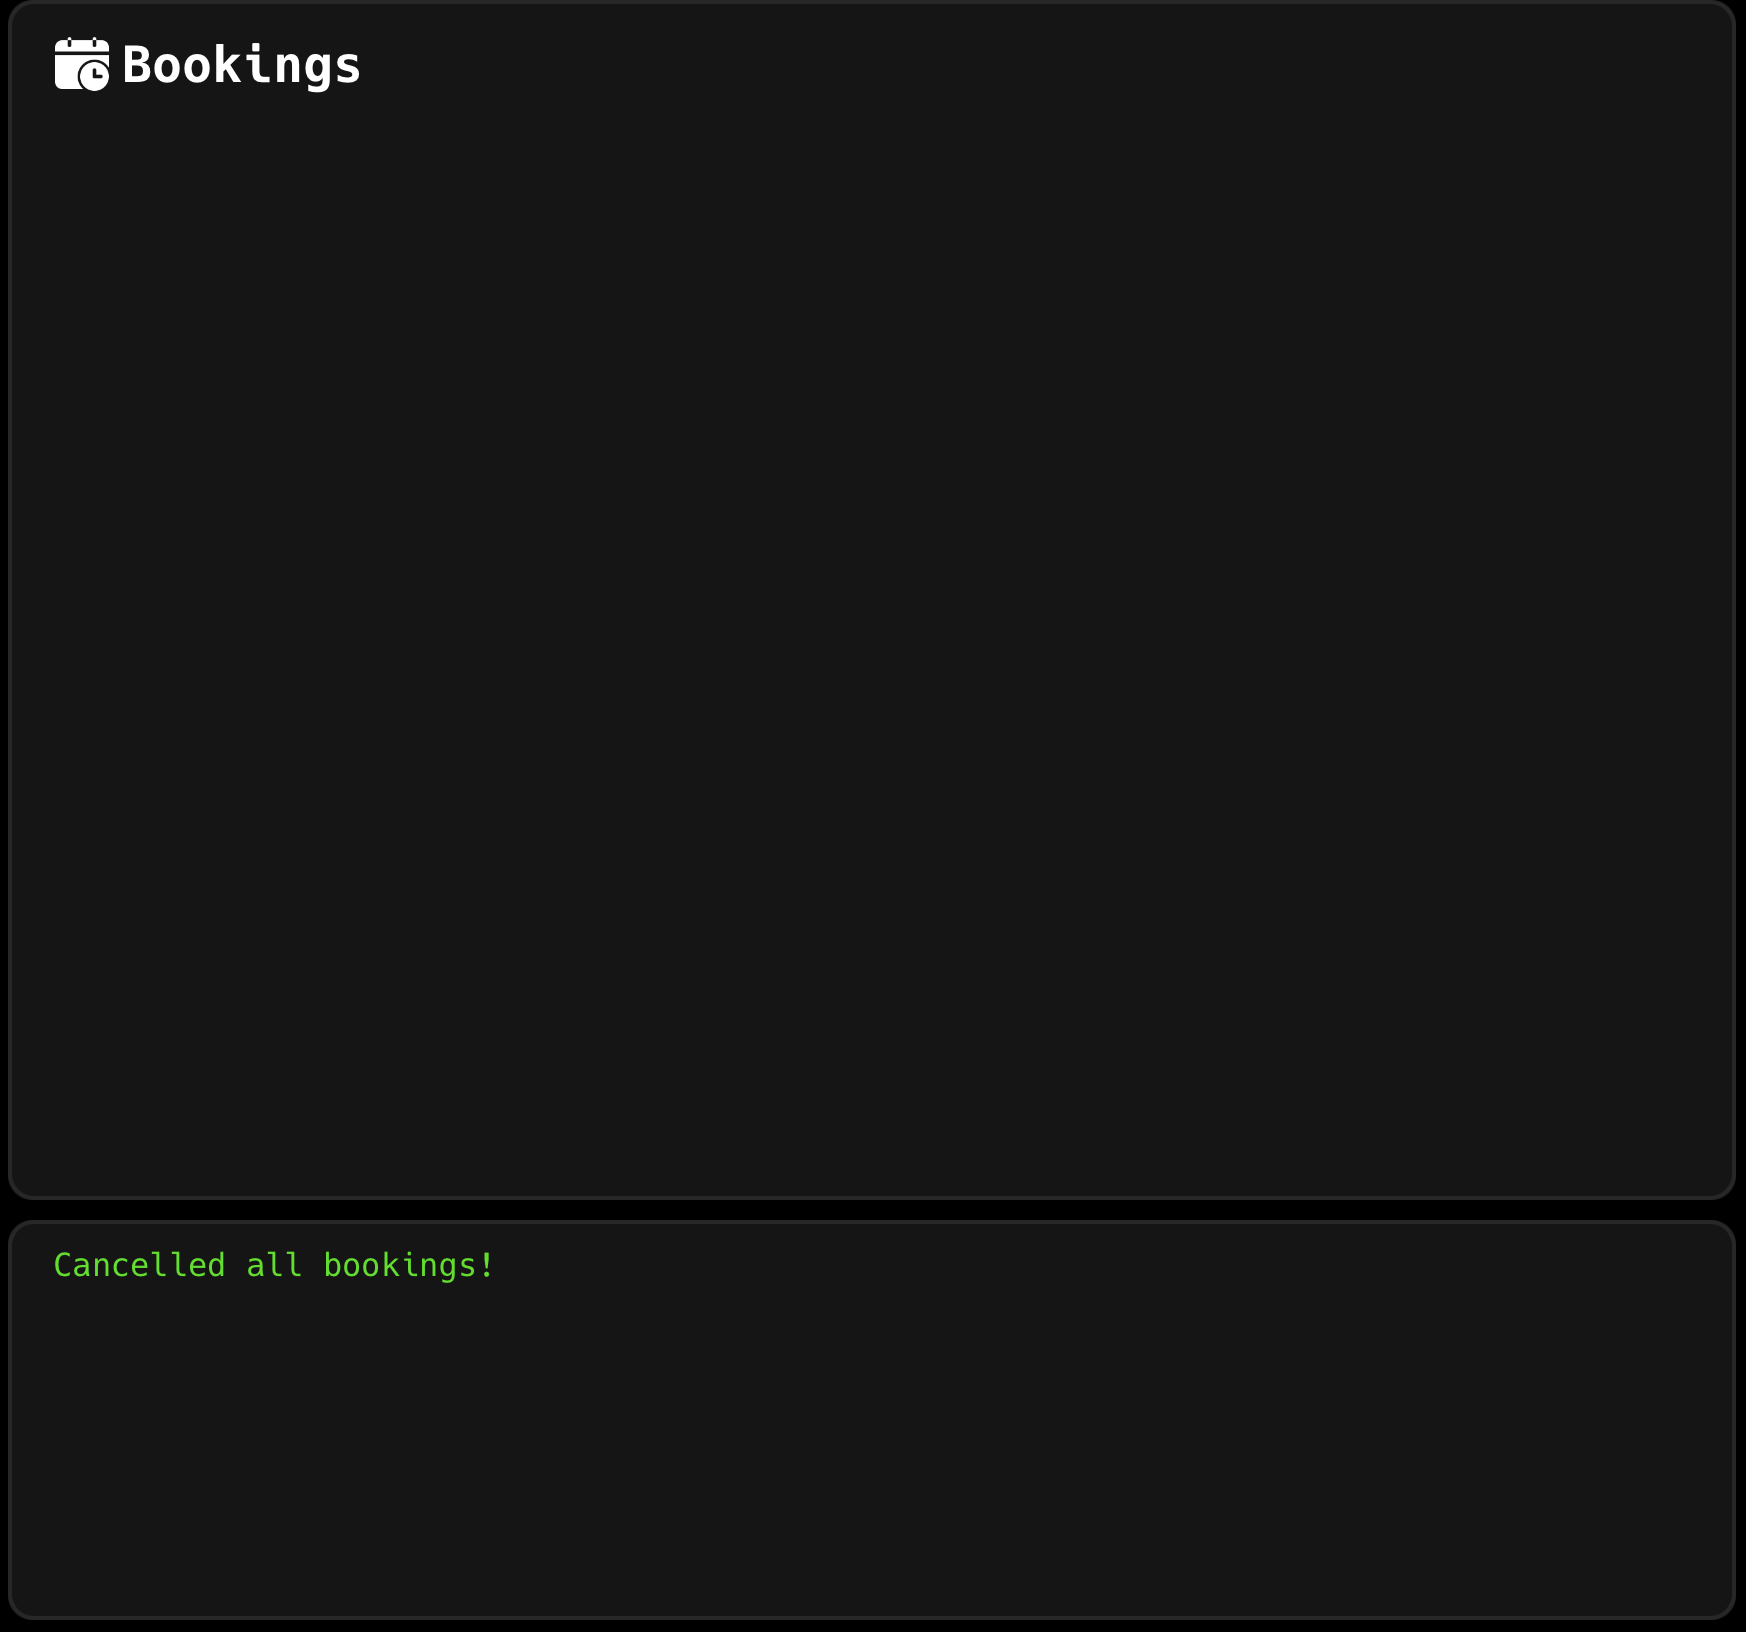
Situation: Want a fresh start from our busy schedule? You can quickly clear all your bookings with:
cancel -a
After executing the command above, your GUI will look similar to the below.
![]() Be careful!
Be careful!
This command is irreversible, and all your data will be lost. Please use this command with caution!
Searching for a booking : search
Situation: You have multiple consultations lined up and decide to search for your CS2103 consult. We shall use the
search command to find our CS2103 consultation details!
search KEYWORD [MORE_KEYWORDS]
- The search is case-insensitive. e.g
coNsUlTwill matchConsult - The order of the keywords does not matter. e.g.
consult CS2103will matchCS2103 Consult - Bookings matching at least one keyword will be returned (i.e.
ORsearch). e.g.Consultwill returnCS2103 Consult,CS5300 Consult
So, let’s try to find CS2103T Consultation using the search command. Here’s the initial window
that will be displayed in case you have a list of consultations.
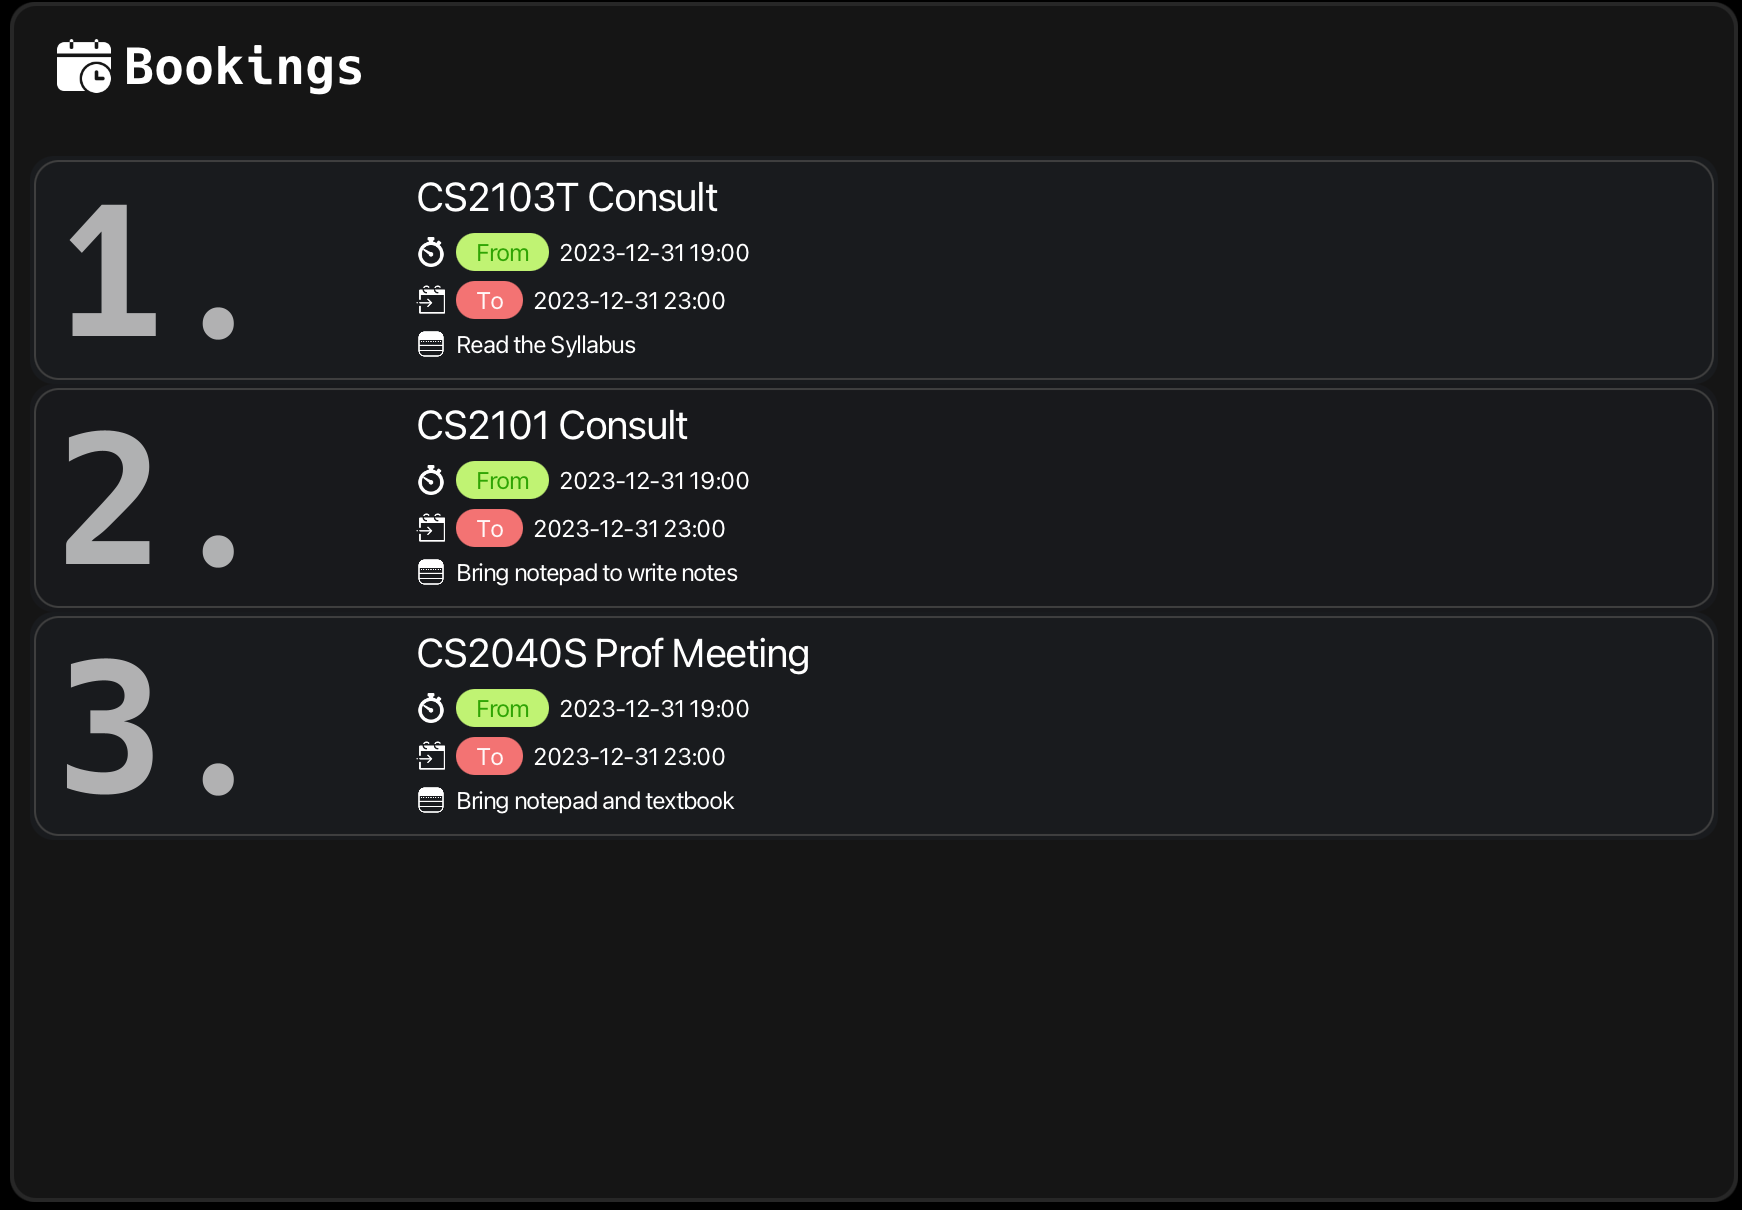
Now, after executing the search command, if the consultation you’re trying to find
exists, it will be displayed like the sample image shown below.
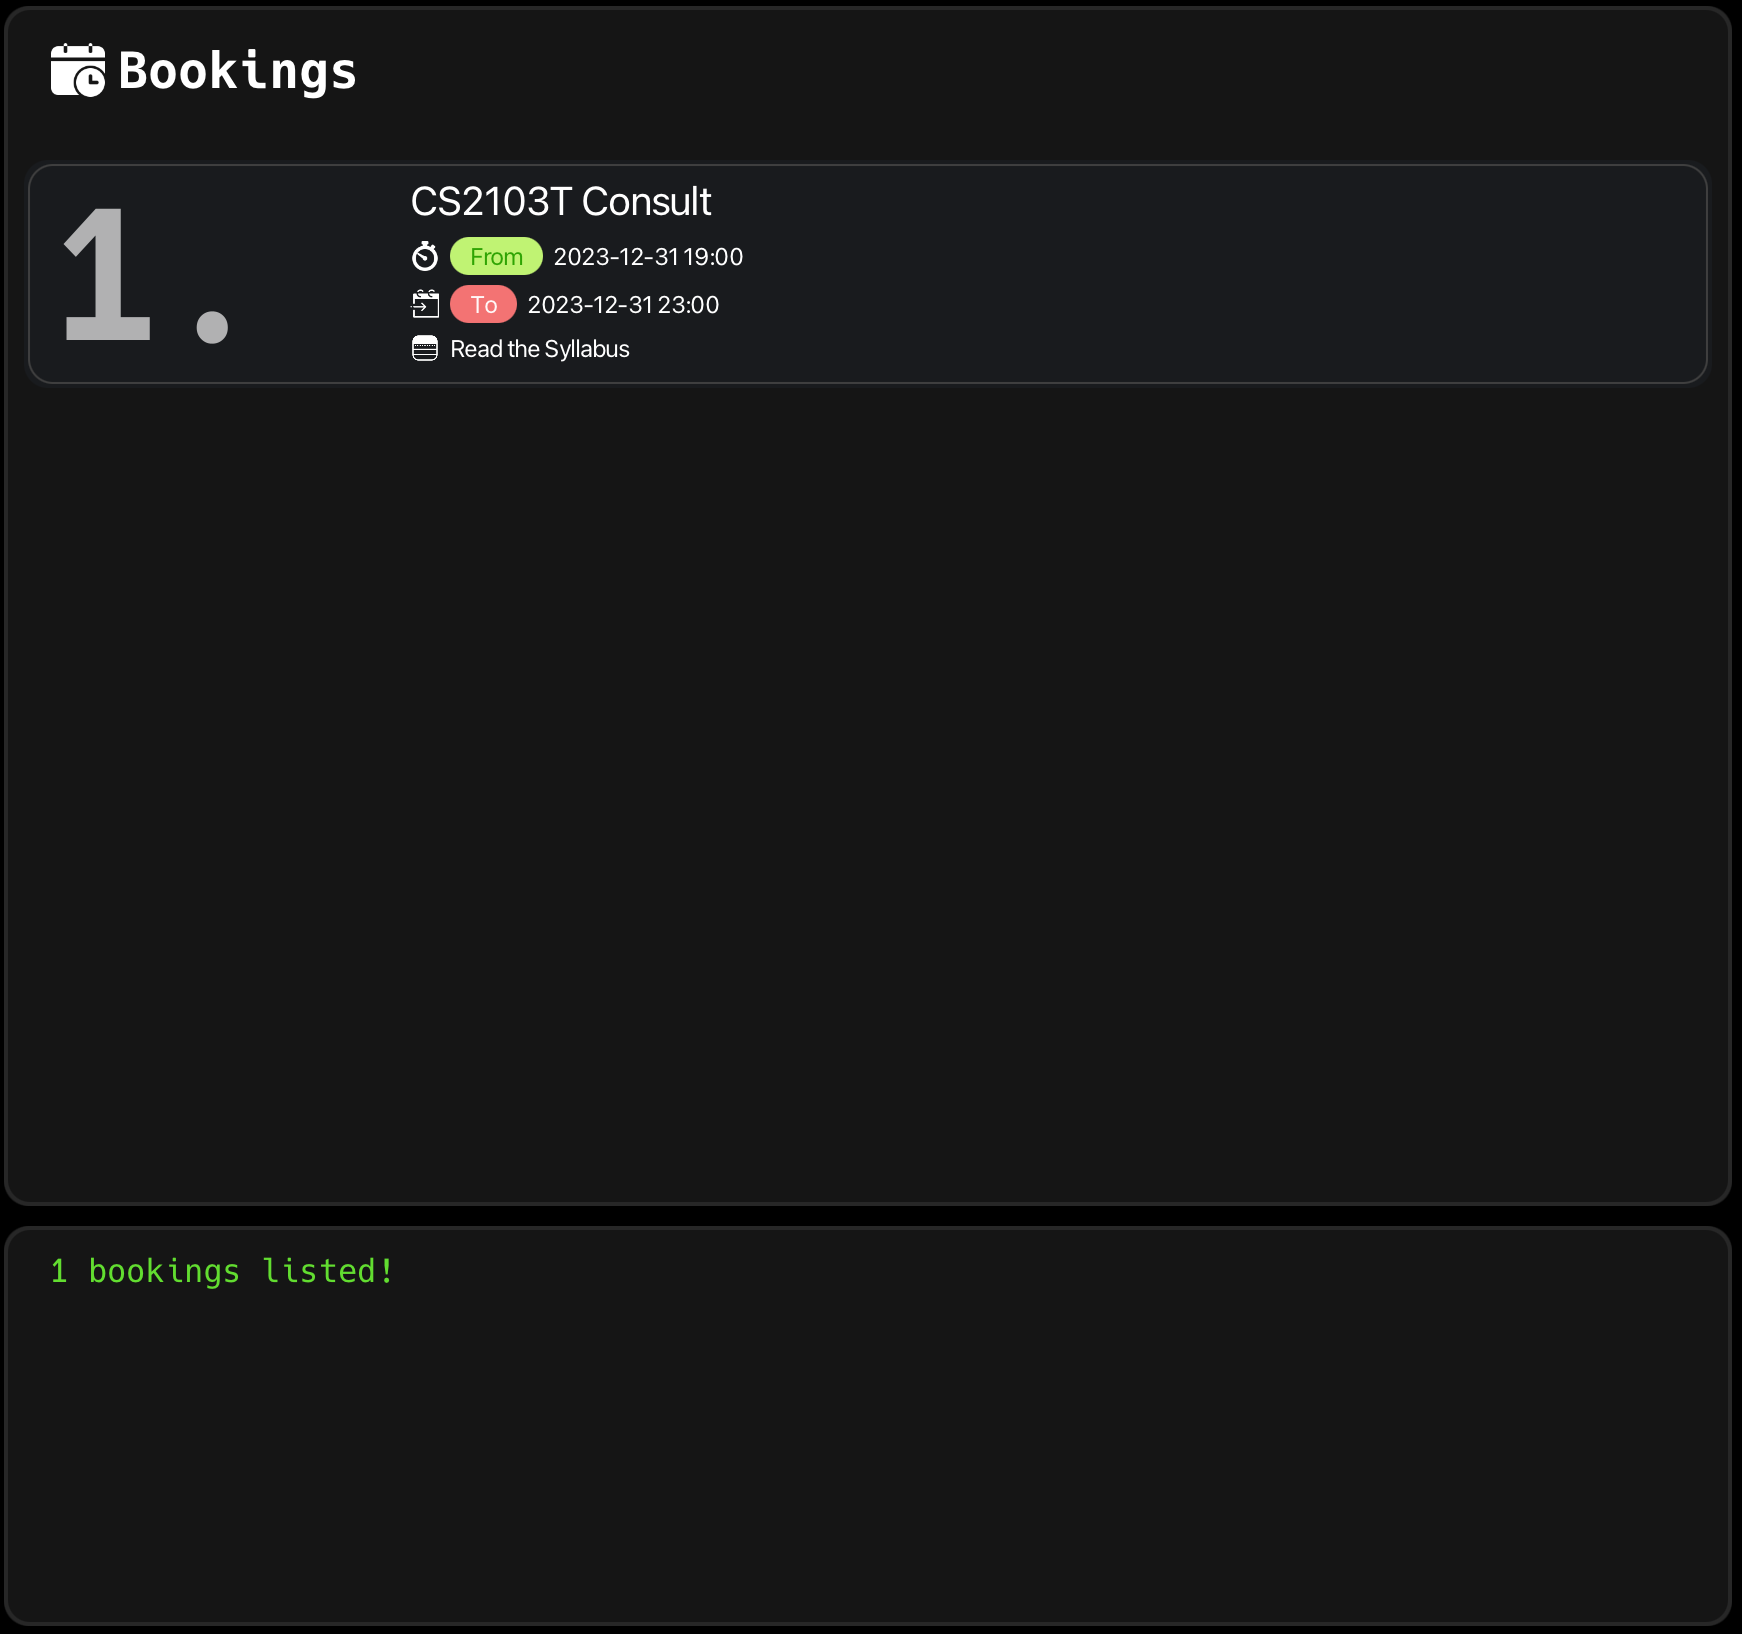
And, in case the booking doesn’t exist, Dook will throw you an error (such as the one below) indicating that it couldn’t find any such bookings in the JSON file.

![]() Tips
Tips
Want to see all your bookings again? Try the view command .
Viewing all bookings : view
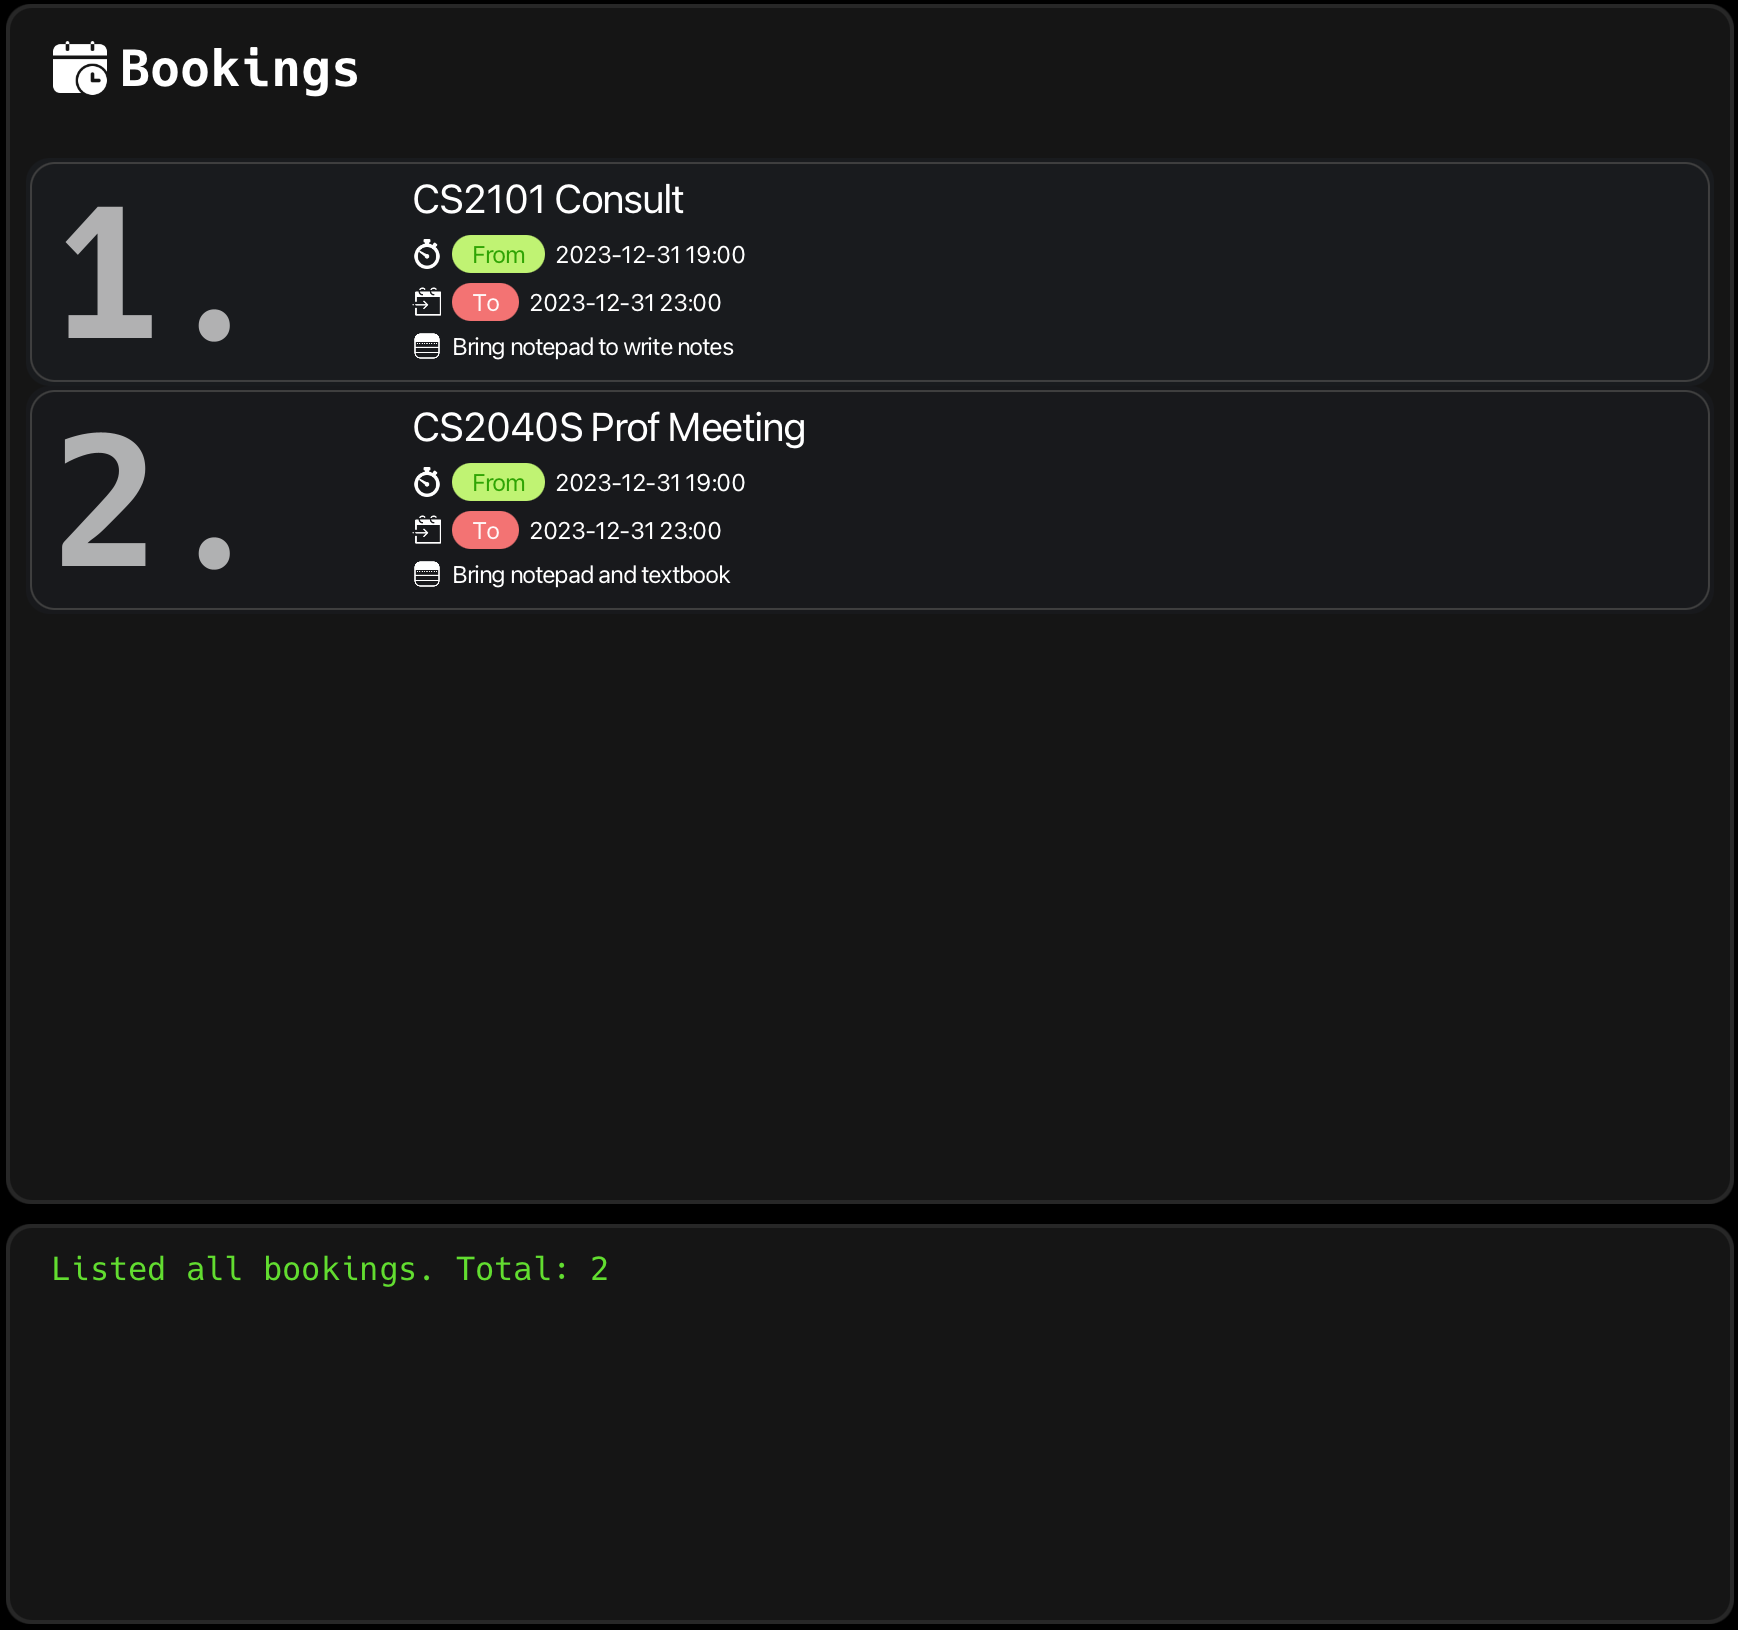
Situation: You are done searching for your CS2103 consult and decide to refresh your memory of all your consults!
We shall use the view command to list all our current bookings!
view
Other features
Changing themes in Dook : theme
Dook comes preinstalled with a light and dark theme.
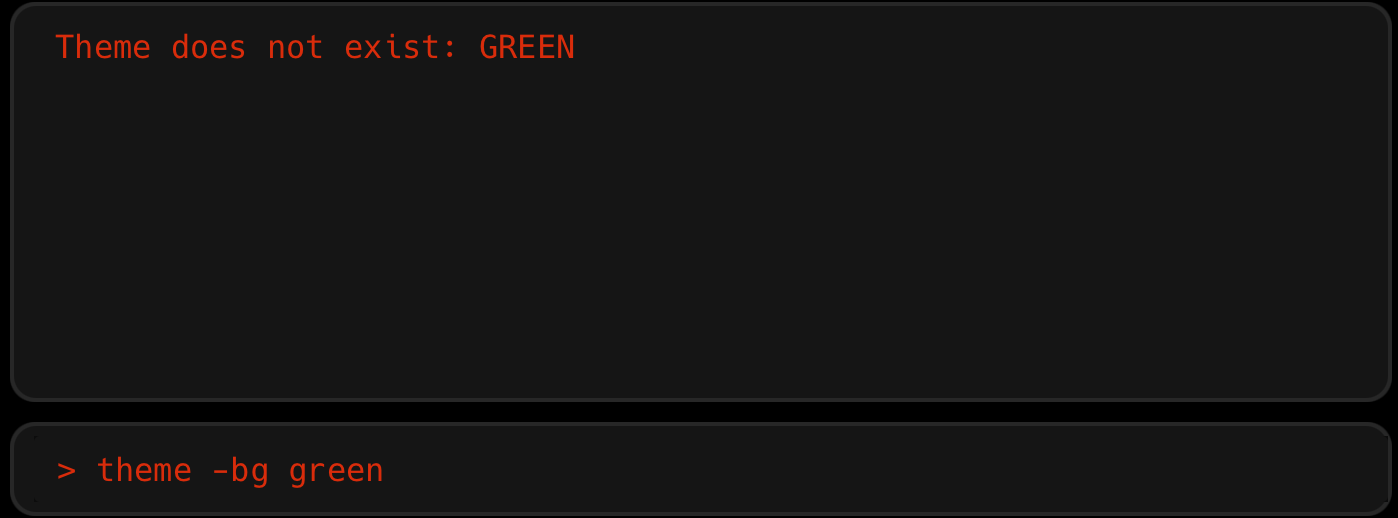
Format: theme -bg THEME
- Changes the current theme to either dark, light or any other theme.
- Dark theme is the default on a new launch
- Dook remembers your preferences, it loads the most recent selected theme on launch.
Examples:
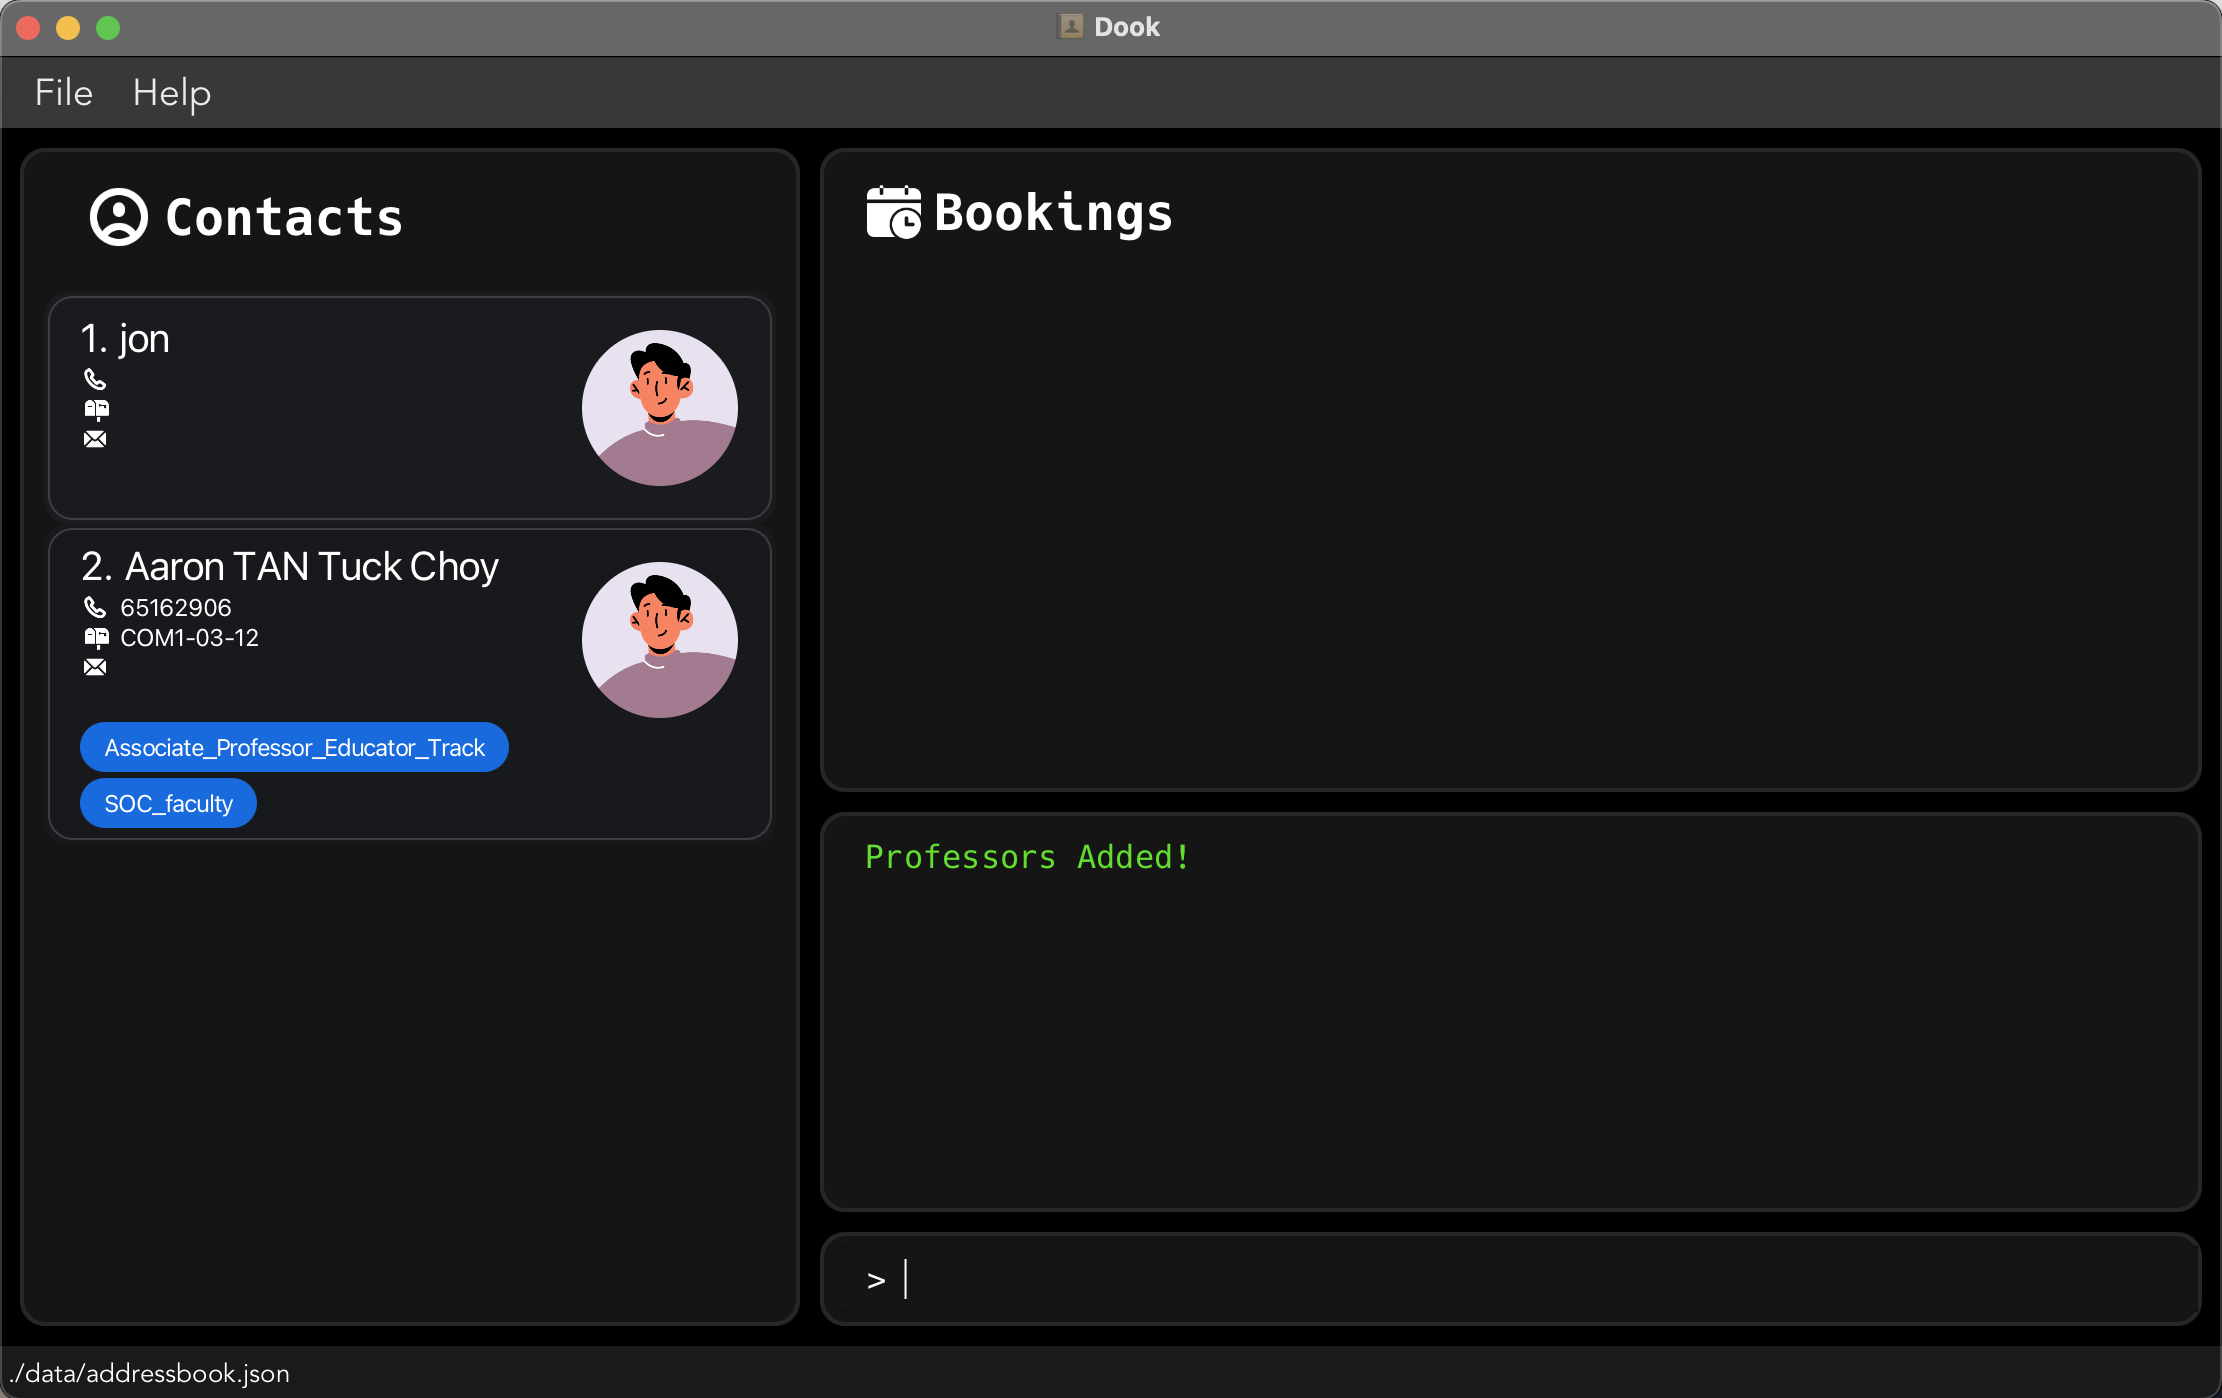
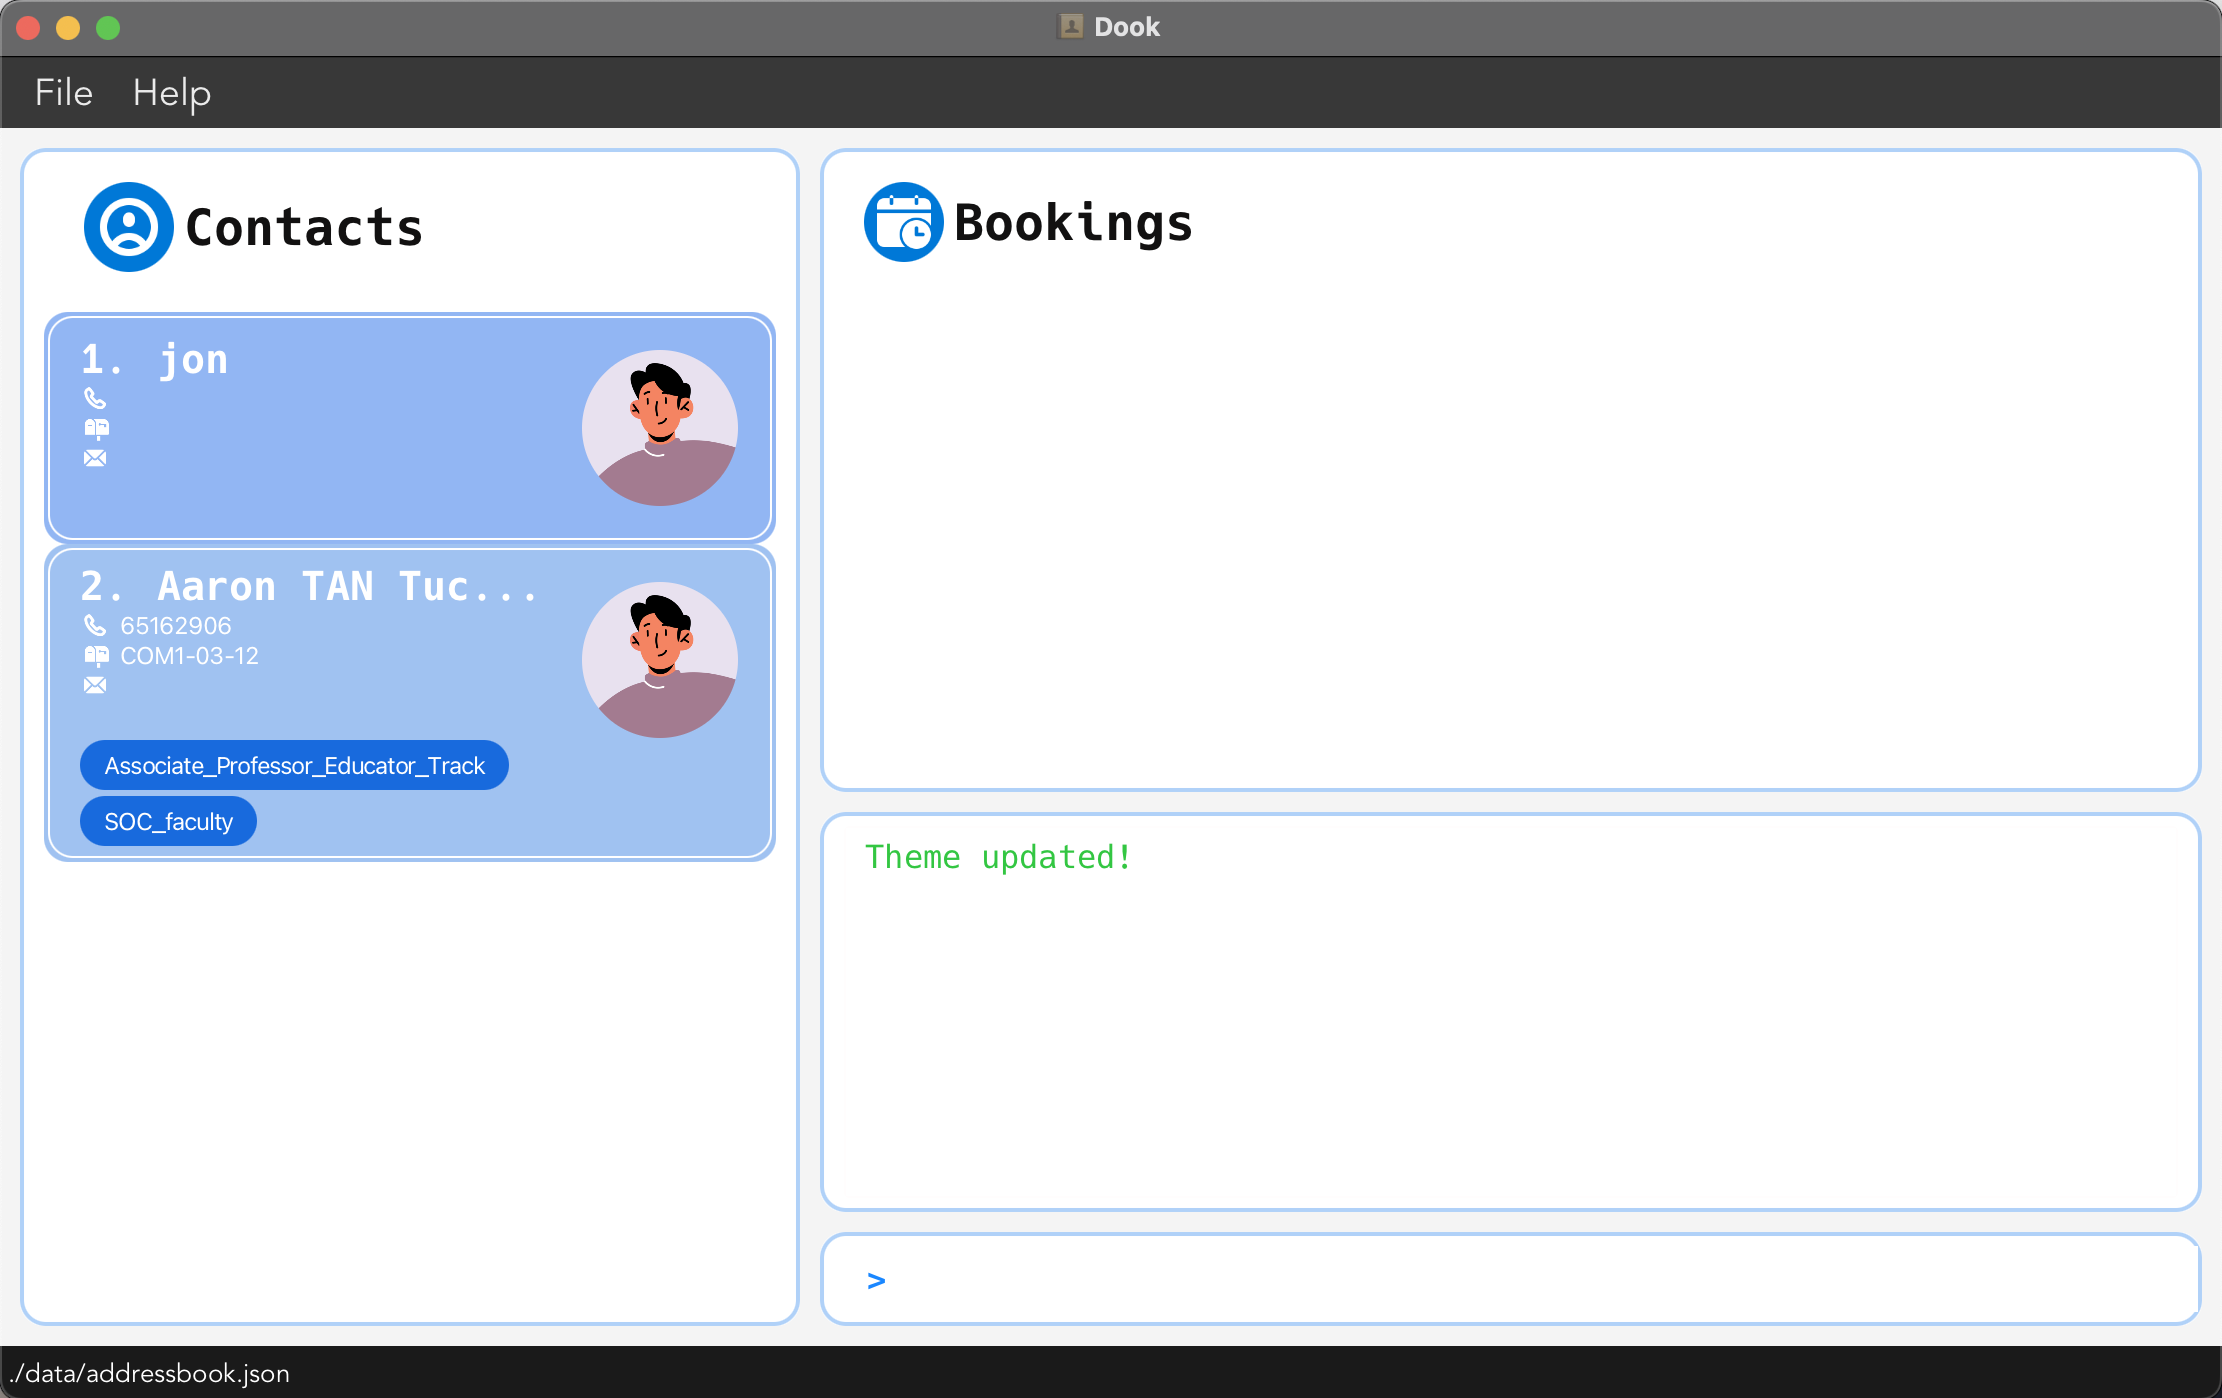
theme -bg light
Below shows the application before executing theme -bg light:
Below shows the application after executing theme -bg light:
Below shows the error message upon executing an invalid theme:
![]() Information
Information
New themes are currently being added. In v1.5, we envisioned to create a tool for users to create their own theme from the
command box itself.
Adding aliases in Dook : alias
For commands that you use often, Dook allows the aliasing of them to any input of your choice.
alias -al NEW_COMMAND -r COMMAND_TO_REPLACE
| Param | Remarks |
|---|---|
| NEW_COMMAND | The new string you would like to use as an alias |
| COMMAND_TO_REPLACE | The original command that you want an alias for |
- For example, if you are often swapping between themes, you can replace
theme -bg lightwithlightusing the command below
alias -al light -r theme -bg light - After that, you can swap to light theme anytime with just
light

After adding the alias above, you can simply type light in the command box to change the theme.
Isn’t that cool?
![]() Tips
Tips
Try adding some more aliases and see how Dook responds efficiently! Remember to
replace the whole command such as theme -bg light otherwise it won’t work as expected.
![]() Caution
Caution
alias can overwrite any commands and will take precedence, and cannot be deleted for now. Use with caution!
![]() Warning
Warning
This feature is meant for advanced users, please be careful
This feature is still in beta, note:
- Aliases cannot be deleted as of the current version
- Aliases must be for the entire command (i.e. cannot replace
add -nwithaddn)
Exiting the program : exit
Exits the program.
Format: exit
Saving the data
Dook’s address book data are saved automatically after any command that changes the data. There is no need to save it manually.
Editing the data file
Dook’s data is saved automatically as a JSON file:
[Dook JAR file location]/data/addressbook.json.
![]() Tips
Tips
Advanced users are welcome to update data directly by editing the json data file.
FAQ
Q: How do I install Java 11?
A: Follow this link for steps to download Java 11.
Q: How do I transfer my data to another Computer?
A: Go to the application’s home directory and copy the data/addressbook.json file containing your data into the empty
data folder created by Dook on the other computer.
Q: Oh no! I have accidentally closed Dook without using the exit command? Do I lose all my data?
A: Not to worry! Dook automatically saves all data after every change, so no data will be lost!
Q: Do I need Internet connection to use Dook?
A: Only once when opening the User Guide using Take me to UG link in Help Window. Otherwise, Dook works fully offline!
Known issues
-
When using multiple screens, if you move the application to a secondary screen, and later switch to using only the primary screen, the GUI will open off-screen. The remedy is to delete the
preferences.jsonfile created by the application before running the application again.
Command Summary
![]() Note:
Note:
The list of valid commands accept only lowercase letters. For example, Book will not be accepted. Please use book instead.
Address Book Command summary
| Action | Format, Examples |
|---|---|
| Add |
add -n NAME [-p PHONE_NUMBER] [-e EMAIL] [-a ADDRESS] [-t TAG]… e.g., add -n John Doe -p 22224444 -e jamesho@example.com -a 123, Clementi Rd, 1234665 -t friend t/colleague
|
| Add Professor |
prof -n NAME or prof -a
|
| Delete |
delete INDEXe.g., delete 3
|
| Edit |
edit INDEX [-n NAME] [-p PHONE_NUMBER] [-e EMAIL] [-a ADDRESS] [-t TAG]…e.g., edit 2 -n James Lee -e jameslee@example.com
|
| Find |
find KEYWORD [MORE_KEYWORDS…]e.g., find James Jake
|
| List | list |
| Clear | clear |
| Help | help |
Booking List Command summary
| Action | Format, Examples |
|---|---|
| Book |
book -n DESCRIPTION -s START_TIME -e END_TIME e.g., book -n Consult with Prof Aaron -s 2024-03-01 19:00 -e 2024-03-01 23:00
|
| View | view |
| Update |
update INDEX [-n DESCRIPTION] [-s START_TIME] [-e END_TIME]e.g., edit 2 -n Prof Aaron's Consultation -s 2024-03-01 14:30
|
| Search |
search KEYWORD [MORE_KEYWORDS]e.g., search Prof Lee's Consultation
|
| Cancel |
cancel INDEX or cancel -ae.g., cancel 2
|
Glossary
| Term | Meaning |
|---|---|
| Address Book (for Dook) | A json file that saves all the data regarding contacts and consultations. |
| CLI (Command Line Interface) | A text-based interface where users type in commands instead of interacting with the application’s graphics. |
| CSV | A text file format that uses commas to separate values. It is supported by a wide range of software, including Microsoft Excel. |
| Command | A line of instructions that you input into the command box. Also see: Command Box |
| Command Box | A box for you to input commands. |
| Command Output Box | A box that displays the results of the command you keyed in. It will tell you whether the command you entered has successfully run, or if there is an error in your command that needs to be fixed. Refer to for a picture. |
| Contact List | The Contact list is the list of contacts on the left side of the application. |
| Booking List | The Booking list is the list of bookings on the right side of the application. |
| GUI (Graphic User Interface) | A graphical based interface where users interact with the application’s graphics like buttons or scroll panes. Also see: CLI |
| JSON | A JSON (JavaScript Object Notation) file is a lightweight data interchange format that’s easy for humans to read and write and easy for machines to parse and generate. JSON files typically use the .json extension and consist of key/value pairs similar to JavaScript object literals. |
| Prefix | A letter or phrase before an input. |
| Tag | A text phrase used to categorize employees by. A tag must be either a Student, Professor, or Teaching Assistant (TA) |
| Index | The number labeling each employee in the employee list. |
| Web browser | An application to serve the web like Internet Explorer, Google Chrome, or Firefox. In fact, you are probably using one to access this guide right now! |